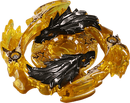
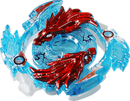
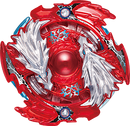
Luinor L2, known as Lost Longinus (ロストロンギヌス, Rosuto Ronginusu) in Japan, is an Energy Layer released as part of the Burst System as well as the Dual Layer System. It debuted with the release of the B-66 Starter Lost Longinus Nine Spiral on December 28th, 2016. It later debuted in western countries with the release of the Starter Pack Luinor L2 Nine Spiral.
Description
Luinor L2 is a wide and heavy Energy Layer designed for Attack that features two large dragon heads, representing the anime's rendition of this Layer's beast, a dragon, that come from the perimeter in towards the center and four wings, two of which are larger and make up the main contact points and two of which are smaller and make up secondary contact points, creating an aggressive, high recoil design. The contact points of the larger wings are molded in the shape of spear heads which are meant to represent this Layer's Japanese namesake, the Roman Soldier Longinus of Christian Mythology who stabbed Christ in the heart with a lance.
Luinor L2 has two main gimmicks: The first are the dragon heads as they are made of metal. The inclusion of the metal makes Luinor L2 one of the heaviest Layers in the game. The second is the fact that this Layer is made to spin Left, opposite to every other Burst Beyblade before it.
The heavy weight of Luinor L2 generates high inertia and with the aggressive design, makes this Layer excel in KO and Burst Attack potential in Left-Spin vs. Left-Spin matches. However, the left-spinning nature of Luinor L2 means that it and a Right-Spin opponent's Layer will spin together like gears if they are of similar spin speed which heavily reduces recoil and rate of Bursts. However, the high recoil shape can still create strong KO potential in Opposite-Spin matches. Furthermore, the opposite spin allows for some degree of Spin Equalization, however not enough to be the primary focus for Combinations.
The Takara Tomy release of Lost Longinus features three teeth of medium-high length that are capable of withstanding the recoil this Layer produces, even against another Left-spin opponents as the heavy weight further increases Burst resistance as the Layer's higher inertia can better resist teeth skipping.
Use in Attack Combinations
Lost Longinus can be put to use in the Attack Combination Lost Longinus 0/2/4/5/7 Cross/Glaive/Bump/Vortex/Meteor Xtreme/Hold/Destroy. The heavy weight of 0/2/4/5/7 Cross/Glaive/Bump/Vortex/Meteor further enhances Lost Longinus' high inertia and the Layer's teeth and weight reduces the Burst risk associated with using heavy Discs while Xtreme/Hold/Destroy's aggressive movement compliments the Layer's KO Attack. Hold/Destroy specifically, due to the soft launch needed control it, is able to give Lost Longinus the low spin velocity needed to give it Burst Attack while allowing the combination to potentially Out Spin its opponent through Spin Equalization and Life After Death if a Burst is not achieved.
Overall
Lost Longinus' heavy weight, aggressive design and strong Burst resistance make the Layer an excellent part in KO Attack Combinations. Its weight prevented the Layer from being outclassed by weight alone with the release of the SwitchStrike/God Layer System. However, with the release of Nightmare Longinus which has greater success in both Opposite-Spin and Same-Spin matches and Bloody Longinus which has greater success in Same-Spin matches, Lost Longinus has become outclassed.
As such, Lost Longinus is not a must have but is instead a welcome addition to any blader's collection.
Products
Takara Tomy
- B-66 Lost Longinus Nine Spiral (White)
- B-111 Random Booster Vol. 10 Crash Ragnaruk.11R.Wd - 07: Lost Longinus 2Reach Merge
- B-00 Lost Longinus Nine Spiral (Red Dragon Ver.) (translucent blue, red painted dragon heads)
- B-00 Lost Longinus Nine Spiral (Gold Dragon Ver.) (red colored plastic, black translucent plastic, gold painted dragon heads)
- B-00 Lost Longinus Nine Spiral (Black Dragon Ver.) (yellow/gold, black painted dragon heads)
Hasbro
- E1056 Luinor L2 Nine Spiral


