Tag: Visual edit |
Tag: Visual edit |
||
| Line 16: | Line 16: | ||
Like its predecessor [[Energy Layer - Legend Spryzen S3|Legend Spriggan]] and successor [[Energy Layer - Cho-Z Spriggan|Cho-Z Spriggan]], '''Spryzen Requiem S3''' is a Dual-Spin Layer with two sets of teeth on the Japanese release for Right-Spin Mode and Left-Spin Mode. |
Like its predecessor [[Energy Layer - Legend Spryzen S3|Legend Spriggan]] and successor [[Energy Layer - Cho-Z Spriggan|Cho-Z Spriggan]], '''Spryzen Requiem S3''' is a Dual-Spin Layer with two sets of teeth on the Japanese release for Right-Spin Mode and Left-Spin Mode. |
||
| − | Like [[Energy Layer - Drain Fafnir|Drain Fafnir]], '''Spryzen Requiem S3''' features rubber parts to allow for Spin Equalization. |
+ | Like [[Energy Layer - Drain Fafnir|Drain Fafnir]] and [[Energy Layer - Geist Fafnir|Geist Fafnir]], '''Spryzen Requiem S3''' features rubber parts to allow for Spin Equalization. |
| − | Like its predecessor [[Energy Layer - Legend Spryzen S3|Legend Spriggan]], as well as [[Energy Layer - Sieg Xcalibur|Sieg Xcalibur]], [[Energy Layer - Luinor L2|Lost Longinus]], [[Energy Layer - Luinor L3|Nightmare Longinus]], every other Cho-Z Layer |
+ | Like its predecessor [[Energy Layer - Legend Spryzen S3|Legend Spriggan]], as well as [[Energy Layer - Sieg Xcalibur|Sieg Xcalibur]], [[Energy Layer - Luinor L2|Lost Longinus]], [[Energy Layer - Luinor L3|Nightmare Longinus]], and every other Cho-Z Layer, '''Spryzen Requiem S3''' features metal in the Layer to increase its weight, in this case in the form of a non-removable Metal God Chip. |
Due to the Dual-Spin Gimmick, recoil between the opponent and '''Spryzen Requiem S3''' can be increased or reduced depending on the Layer's setting and the opponent's spin direction. While the asymmetrical design may imply different performance depending on spin direction, '''Spryzen Requiem S3'''<nowiki/>'s round design makes little to no discernible difference between Right-Spin Mode and Left-Spin Mode. Because of this, it is recommended to set the Layer to spin opposite to the opponent to maximize Defense and Stamina potential as there is too little recoil for Attack potential. |
Due to the Dual-Spin Gimmick, recoil between the opponent and '''Spryzen Requiem S3''' can be increased or reduced depending on the Layer's setting and the opponent's spin direction. While the asymmetrical design may imply different performance depending on spin direction, '''Spryzen Requiem S3'''<nowiki/>'s round design makes little to no discernible difference between Right-Spin Mode and Left-Spin Mode. Because of this, it is recommended to set the Layer to spin opposite to the opponent to maximize Defense and Stamina potential as there is too little recoil for Attack potential. |
||
| − | Due to the high friction rubber parts, '''Spryzen Requiem S3''' is capable of Spin Equalization with an Opposite-Spin opponent, allowing a '''Spryzen Requiem S3''' Combination to Out Spin its opponent depending on the Performance Tip, Disc and/or Frame used. While the effect is noticeably less than that of [[Energy Layer - Drain Fafnir|Drain Fafnir]] due to there being only two points of rubber contact, it is still comparable. |
+ | Due to the high friction rubber parts, '''Spryzen Requiem S3''' is capable of Spin Equalization with an Opposite-Spin opponent, allowing a '''Spryzen Requiem S3''' Combination to Out Spin its opponent depending on the Performance Tip, Disc and/or Frame used. While the effect is noticeably less than that of [[Energy Layer - Drain Fafnir|Drain Fafnir]] and [[Energy Layer - Geist Fafnir|Geist Fafnir]] due to there being only two points of rubber contact, it is still comparable. |
The thickness and thus weight of the Layer creates high inertia and Outward Weight Distribution which increases the Stamina, KO resistance and Burst resistance of the Layer, making '''Spryzen Requiem S3''' a Top-Tier choice for Defense and Stamina Combinations. |
The thickness and thus weight of the Layer creates high inertia and Outward Weight Distribution which increases the Stamina, KO resistance and Burst resistance of the Layer, making '''Spryzen Requiem S3''' a Top-Tier choice for Defense and Stamina Combinations. |
||
Revision as of 17:48, 18 November 2018
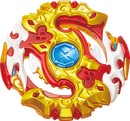
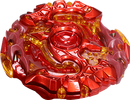
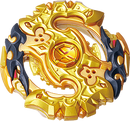
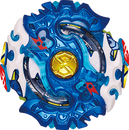
Spryzen Requiem S3, known as Spriggan Requiem (スプリガンレクイエム, Supurigan Rekuiemu) in Japan, is an Energy Layer released as part of the Burst System as well as the God Layer System. It debuted with the release of the B-100 Starter Spriggan Requiem 0 Zeta on December 28th, 2017. It later debuted in western countries with the release of the SwitchStrike Starter Pack Spryzen Requiem S3 0 Zeta.
Description
Spryzen Requiem S3 is a Balance Type Energy Layer that features an overall circular perimeter with small indents, creating a shape akin to Jail Jormungand, two heads, meant to represent the Layer's Japanese namesake; the spriggan, a legendary beast of Cornish Faery Lore, and a large double bladed axe that goes from the center to the perimeter. As part of the SwitchStrike/God Layer System, Spryzen Requiem S3 features gimmicks;
Like its predecessor Legend Spriggan and successor Cho-Z Spriggan, Spryzen Requiem S3 is a Dual-Spin Layer with two sets of teeth on the Japanese release for Right-Spin Mode and Left-Spin Mode.
Like Drain Fafnir and Geist Fafnir, Spryzen Requiem S3 features rubber parts to allow for Spin Equalization.
Like its predecessor Legend Spriggan, as well as Sieg Xcalibur, Lost Longinus, Nightmare Longinus, and every other Cho-Z Layer, Spryzen Requiem S3 features metal in the Layer to increase its weight, in this case in the form of a non-removable Metal God Chip.
Due to the Dual-Spin Gimmick, recoil between the opponent and Spryzen Requiem S3 can be increased or reduced depending on the Layer's setting and the opponent's spin direction. While the asymmetrical design may imply different performance depending on spin direction, Spryzen Requiem S3's round design makes little to no discernible difference between Right-Spin Mode and Left-Spin Mode. Because of this, it is recommended to set the Layer to spin opposite to the opponent to maximize Defense and Stamina potential as there is too little recoil for Attack potential.
Due to the high friction rubber parts, Spryzen Requiem S3 is capable of Spin Equalization with an Opposite-Spin opponent, allowing a Spryzen Requiem S3 Combination to Out Spin its opponent depending on the Performance Tip, Disc and/or Frame used. While the effect is noticeably less than that of Drain Fafnir and Geist Fafnir due to there being only two points of rubber contact, it is still comparable.
The thickness and thus weight of the Layer creates high inertia and Outward Weight Distribution which increases the Stamina, KO resistance and Burst resistance of the Layer, making Spryzen Requiem S3 a Top-Tier choice for Defense and Stamina Combinations.
However, like Legend Spriggan, in order to facilitate the Dual-Spin gimmick, two of the teeth on each set are made to the thickness of those found on Single Layers, meaning that the first two teeth on each set will wear down fairly quickly. Due to this, it is recommended to have multiple copies of this Layer and to be prepared to replace it.
Use in Defense/Stamina Spin Equalization Combinations
Spriggan Requiem can be put to use in the Defense/Stamina Spin Equalization Combination Spriggan Requiem 0/2/4/5/7/10 Cross/Glaive Atomic/Orbit/Destroy. Spriggan Requiem's Stamina and KO resistance is bolstered by the Stamina and weight of the 0/2/4/5/7/10 Disc and the Stamina of the Atomic/Orbit/Destroy Tip while the heavy weight and teeth of the Layer and the free-spinning and plastic nature of the Tip compensates for the increased Burst risk of using heavy Discs. When spinning opposite to the opponent, the rubber of Spriggan Requiem and the low friction of the Atomic/Orbit/Destroy Tip allows for high amounts of Spin Equalization while the Life After Death of Cross/Glaive and Atomic/Destroy allows the Combination to Out Spin its opponent.
Overall
Due to Spriggan Requiem's round shape, heavy weight, Spin Equalization potential, strong teeth and Dual-Spin nature, this Layer has become a Top-Tier choice for Defense and Stamina Combinations, outclassing Alter Chronos and Drain Fafnir and to the point of being banned in tournament play.
While now legal for tournament play, Spriggan Requiem is still a must have for competitive bladers. However, due to the teeth wear, it is recommended to have multiple copies of this Layer to replace ones that have worn down.
Differences in the Hasbro Version
Hasbro's Spryzen Requiem S3 is virtually unchanged from Takara Tomy's Spriggan Requiem with the gimmicks intact. The only difference is that the Metal God Chip is thinner to facilitate the QR Code for the Beyblade Burst App, creating a negligibly lighter weight as well as unpainted. With the use of slopes, Spryzen Requiem S3 does not wear down. Due to this, Spryzen Requiem S3 is also banned in tournament play.
As such, despite the ban, Spryzen Requiem S3 is a must have for competitive bladers in the Hasbro-Only Format.
Products
Takara Tomy
- B-100 Spriggan Requiem 0 Zeta (red and gold, white rubber, blue god chip)
- B-100 Spriggan Requiem 0 Zeta (Black Ver.) (black and gold, white rubber, red god chip)
- B-111 Random Booster Vol. 10 Crash Ragnaruk.11R.Wd - 06: Spriggan Requiem 6Meteor Iron
- B-00 Spriggan Requiem 0 Zeta (Flame Axe Ver.)
- B-00 Spriggan Requiem 0 Zeta (Golden Axe Ver.)
- B-00 Spriggan Requiem 0 Zeta (Silver Axe Ver.)
Hasbro
Gallery
Takara Tomy
Hasbro
Trivia
- The chances of pulling the Black recolor of Spriggan Requiem is 1 out of 72.


