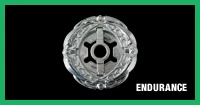
Flash Sagittario 230WD (フラッシュサジタリオ230WD Furasshu Sajitario 230WD)is a Stamina-Type Beyblade that appears in the anime, Beyblade: Metal Fury. It was released on February 19th, 2012 in Japan as the evolution of Flame Sagittario C145S. The Hasbro version of this bey will be released in the Hyperblades series in early December 2012. It is owned by Kenta Yumiya.
Face Bolt: Sagittario II

The Face Bolt is basically the evolved version of Flame Sagittario's Face Bolt. The arrow and eyes of Sagittario have become bolder, and "SGTO" mark has been removed. It has a bright yellowish-orange background (resembling a flash of light) on a translucent orange Face Bolt.
4D Energy Ring: Sagittario II
Sagittario II has somewhat of resemblance to the original Sagittaro Energy Ring but is more circular with fewer bumps and curves as a result. Sagittario II even bears resemblance to Flame, mostly in it's circular shape and has the stylized 'points' the Flame Wheel have. Sagittario II is a translucent gold, similar to Quetzalcoatl and has red, white, and blue decals, similar to that of the flags of many nations. It is amongst the heaviest Energy Rings, which makes it great for Defense customisations. It also has arrows on each side of it.
Customizations
- Phantom Saggitario II B:D (Stamina)
Attack: 2 - Defense: 1 - Stamina: 4

4D Fusion Wheel: Flash
- Total Weight: 45.6 grams
Metal Frame
Flash's Metal Frame resembles the original Flame Fusion Wheel. It is in an oval shape. It's underside is hollow, and due to this, weight is lost.
Core
The core clearly resembles the Metal Frame, but looking slightly more like a circle. It retains it's bows and small spikes though.
Performance
Like other 4D Metal Wheel, Flash is able to change modes. 'Attack Mode', where the Wheel takes an oval shape reminiscent of its original form, Saggittario (Pre-HWS). By simply turning the Metal Frame sideways, Flash enters 'Stamina Mode', where Flash takes a layered resemblance, looking like it's previous form, Flame Saggittario. Because of the ovular Frame and Core being stacked in opposite directions, this mode looks more like a circle compared to the oval-like shape of Attack Mode.
Stamina Mode doesn't hold too much Stamina to stay up long, because the Wheel has too many points of weight distribution, having about four or five. And since Attack Mode only has two points of weight distribution, not only does it hold more Stamina than Stamina Mode, but is overall much better. However, since Attack Mode is an oval-like shape it catches the wind and reducing rotation speed. It has found great use in Attack customizations with its minimum recoil. It also does a great job at pushing opposing beys; staggering them into a corner and losing their balance. It also has less chances of being knocked out compared to other top-tier Attack Wheels like Variares, Beat and Fang.
Customizations
- MF-H Flash (Attack mode) Orion/Cetus/Unicorno S130/CH120R2F (Attack)
- MF-H Flash Orion W145 (Attack mode) MF (Balance)
Attack: 2 - Defense: 1 - Stamina: 4 (Stamina Mode)
Attack: 2 - Defense: 1 - Stamina: 2 (Attack Mode)
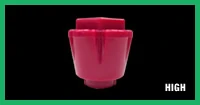
Spin Track: 230
- Weight: 4.1 grams
230 is a remarkably tall Spin Track. It is quite thick in order to protect itself from Beys. Because it was designed to force shorter Beyblades to hit the Spin Track, it provides great Defense against low attacking Beys such as Mercury Anubis. It is also currently the highest Track, and its height has made a large impact on the metagame. Before Flame Byxis' release, low-height Beyblades such as the 85 Track dominated competitive play, but the 230 Spin Track is not affected by shorter Beyblades at all, and thus completely defeated the Low-Track metagame.
Higher Tracks such as 130 or higher are recommended for battle against 230. However, 230's main downfall is being attacked by Beys with high tracks that are still lower than 230, such as 145, and Left-Spinning Beys such as L-Drago Destroy F:S. TH170 can outperform 230 though due to it's ability to change height from 170, 195, and 220 and the Sharp series of Performance Tips should never be used with 230 due to 230's height, which causes imbalance through lack of sufficient contact with the stadium at low spin velocities. Despite this, 230 is a great Track nevertheless, and very useful for Defense.
Customizations
- Duo Aquario 230MB (Balance)
- Duo Bull 230D (Stamina)
- MF Death Kerbecs 230 (Defense Mode) RS
Attack: 0 - Defense: 0 - Stamina: 11
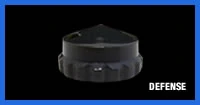
Performance Tip: Wide Defense (WD)
- Weight: 0.71 grams
Wide Defense (WD), as it's name implies, is the widest of the Defense series of Performance Tips (D, SD, PD, EWD, W²D). When compared to D, is still contains the gear-like shape and is of course wider with the Sharp tip wider and taller as well. WD also retains the two curved holes D contained but are now thinner, smaller and found on the Sharp tip. WD is a translucent yellow in color.
Being wider brings advantages and disadvantages to WD. An advantage is being able to conserve better Stamina than D and SD, due to the more surface area as well as being able to spin at a lower spin-rate that that of D or SD, which cannot. A disadvantage however, is worse balance than D. The wide shape gives WD a harder time to regain it's balance whereas, D does it much easier. This can be terrible when faced with an Attack-Type, although this should not be kept as a worry as it can be an advantage. This should take into consideration when using a Spin Track such as 230 or TH170. D would be a better choice than WD as it would regain balance much easier to help cope with 230. WD can also defeat Attack-Types with a weak launch in the opposite direction to absorb the opponent's attacks by spin-equalizing.
At release, WD has found quick use as a Stamina Type Tip, much better than D and has become top-tier. However, as many more Performance Tips like CS, EDS, and B:D were released, they have overshadowed WD in some way at least. Despite all of this, WD is still a great Performance Tip for Stamina. Just like the rest of the D series, WD does not carry any Defense potential in spite of its name, rather, WD has use in Stamina. So in all in all, even though WD may not be the best Stamina-Type Tip, it still has use in the metagame and, most importantly, can be a great Stamina-Type Performance Tip, in the right combo.
Attack: 0 - Defense: 5 - Stamina: 2

Special Moves
- Diving Arrow: With control of the diving claw added with Ryuga's Star Fragment, Flash Sagittario could easily manipulate flames and heat while in mid air, covering itself in a glowing ball of fire. As if an archer were firing it, Saggitario flies at the opponent, diving down and exploding the field into flames. This attack was first used to defeat Pluto. It was also used to defeat Rago but failed.
Gallery
Development
")
")
")
")
")
")
")
")
")
")
")
.jpg "81v77aS3ukL. SL1500 (1).jpg (401 KB)")
.jpg "81NQJuIh7bL. SL1500 (1).jpg (430 KB)")
")
")
CoroCoro Scans
")
")
")
")
")
")
")
Videos

Beyblade BB-126 Flash Sagittario 230WD ベイブレード

Trivia
- The red, white, and blue stickers on Sagittario II are the colors of many world's nations flags.
- This is the 3rd time that the 230WD combination has been released: First with Flame Byxis 230WD, then Duo Uranus 230WD.
- Flash Sagittario's Attack mode has more Stamina than its Stamina mode, however, it's oval shape catches the wind, reducing rotation speed, so Stamina is probably still the better mode for stamina.
- Flash Sagittario bears some resemblances to Duo Uranus: first they are both 4D Stamina types that use the 230WD combo, and they are the only two out of four 4D Stamina types that don't need to turn the metal frame upside down to change modes.
- Flash Sagittario had to create an entirely new special move on MFB Episode 150, due to the fact that Sagittario no longer had C145 (Claw 145).
- Flash Sagittario's new Special Move is called "Diving Arrow", replacing "Flame Claw" and "Diving Claw". Diving Arrow was first used to defeat Fusion Hades AD145SWD on Beyblade: Metal Fury Episode 48.
- This is the second Stamina type bey that mode change by rotating the Metal Wheel, the first being Duo Uranus.
- In the Zero-G poster, Flash Sagittario can be paired by W145CF from Samurai Ifraid W145CF
- It was originally thought that its parts would include GB145MES.
- It was unknown why they used the 230WD combo for this beyblade, but later found out to be used to be especially good in the Zero-G Stadium (Defense tips are now Stamina and Stamina tips are now Defense).
- It was destroyed faster than any other bey by Nemesis in the Final Battle. Then again, it was used the most, next to Pegasus in the final battle.
- One reason Flash Sagittario didn't inherit a claw system like Flame Sagittario would be due to the claws being destroyed in the battle against Rago in the Lost Kingdom.
- As Flash Sagittario was newly evolved, Nemesis did not have the Shadow beast of Sagittario, but it did destroy Flash Sagittario by using Ryuga's Dragon Emperor's Shadow beast. It may be because Sagittario evolved only by using Ryuga's Star Fragment.
- Hasbro has released this bey in the Hyperblades series. Among all the HyperBlades Series Beyblades (So Far), it is the most similar to the Takara Tomy version.
- Both Flash's modes resemble Sagittario's previous forms.
- Flash Sagittario was the last new Beyblade shown in the Metal Saga anime trilogy (Metal Fusion, Metal Masters, Metal Fury), which is interesting because the first Beyblade shown in the trilogy was its predecessor, Flame Sagittario C145S.
See also
References
External Links
- WBO thread on Flash Sagittario
| |||||||||||||||||