No edit summary Tag: Visual edit |
Tag: Source edit |
||
| (36 intermediate revisions by 3 users not shown) | |||
| Line 1: | Line 1: | ||
| − | {{About|parts included within the HyperSphere System|List of Gatinko Layer System parts|parts included within the Gatinko Layer System}} |
+ | {{About|parts included within the HyperSphere System, a subsystem of the [[Burst System]]|List of Gatinko Layer System parts|parts included within the Gatinko Layer System}} |
| − | |||
| − | This is a list of all parts included within [[Hasbro]]'s [[HyperSphere System]], a subsystem of the [[Burst System]]. |
||
__TOC__ |
__TOC__ |
||
| Line 9: | Line 7: | ||
! style="width:10%" |Image |
! style="width:10%" |Image |
||
! style="width:40%" |Name |
! style="width:40%" |Name |
||
| + | |- |
||
| + | ![[File:GTChipAchillesA5.png|100px|link=Special:FilePath/GTChipAchillesA5.png]] |
||
| + | |[[GT Chip - Achilles A5|Achilles A5]] |
||
| + | |- |
||
| + | ![[File:GTChipApocalypseA5.png|100px|link=Special:FilePath/GTChipApocalypseA5.png]] |
||
| + | |[[GT Chip - Apocalypse A5|Apocalypse A5]] |
||
|- |
|- |
||
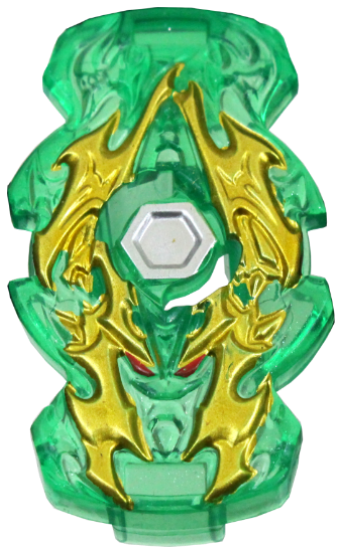
![[File:GTChipAshindraA5.png|100px]] |
![[File:GTChipAshindraA5.png|100px]] |
||
| Line 16: | Line 20: | ||
|[[GT Chip - Balkesh B5|Balkesh B5]] |
|[[GT Chip - Balkesh B5|Balkesh B5]] |
||
|- |
|- |
||
| − | ![[File: |
+ | ![[File:GTChipCobraC5.png|100px|link=Special:FilePath/GTChipCobraC5.png]] |
| + | |[[GT Chip - Cobra C5|Cobra C5]] |
||
| + | |- |
||
| + | ![[File:GTChipCyclopsC5.png|100px|link=Special:FilePath/GTChipCyclopsC5.png]] |
||
| + | |[[GT Chip - Cyclops C5|Cyclops C5]] |
||
| + | |- |
||
| + | ![[File:GTChipDevolosD5.png|100px|link=Special:FilePath/GTChipDevolosD5.png]] |
||
|[[GT Chip - Devolos D5|Devolos D5]] |
|[[GT Chip - Devolos D5|Devolos D5]] |
||
|- |
|- |
||
![[File:GTChipDragonD5.png|100px]] |
![[File:GTChipDragonD5.png|100px]] |
||
|[[GT Chip - Dragon D5|Dragon D5]] |
|[[GT Chip - Dragon D5|Dragon D5]] |
||
| + | |- |
||
| + | ![[File:GTChipEvoDevolosD5.png|100px|link=Special:FilePath/GTChipEvoDevolosD5.png]] |
||
| + | |[[GT Chip - Evo Devolos D5|Evo Devolos D5]] |
||
| + | |- |
||
| + | ![[File:GTChipEvoDragonD5.png|100px|link=Special:FilePath/GTChipEvoDragonD5.png]] |
||
| + | |[[GT Chip - Evo Dragon D5|Evo Dragon D5]] |
||
| + | |- |
||
| + | ![[File:GTChipEvoGenesisG5.png|100px|link=Special:FilePath/GTChipEvoGenesisG5.png]] |
||
| + | |[[GT Chip - Evo Genesis G5|Evo Genesis G5]] |
||
|- |
|- |
||
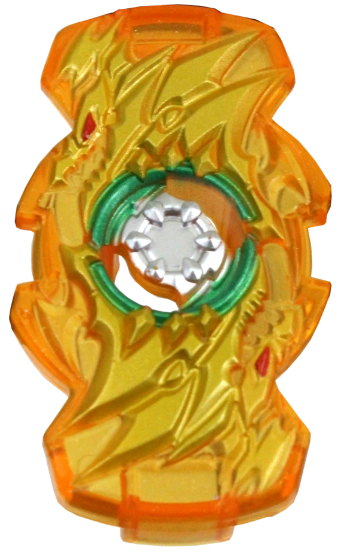
![[File:GTChipFafnirF5.png|100px]] |
![[File:GTChipFafnirF5.png|100px]] |
||
|[[GT Chip - Fafnir F5|Fafnir F5]] |
|[[GT Chip - Fafnir F5|Fafnir F5]] |
||
| + | |- |
||
| + | ![[File:GTChipGenesisG5.png|100px|link=Special:FilePath/GTChipGenesisG5.png]] |
||
| + | |[[GT Chip - Genesis G5|Genesis G5]] |
||
|- |
|- |
||
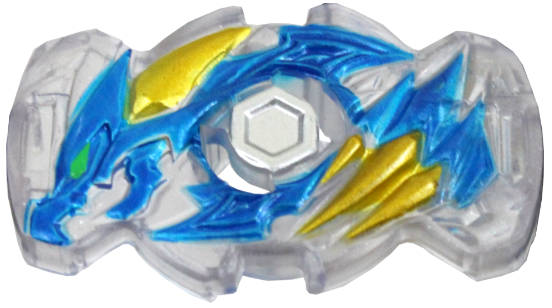
![[File:GTChipHydraxH5.png|100px]] |
![[File:GTChipHydraxH5.png|100px]] |
||
|[[GT Chip - Hydrax H5|Hydrax H5]] |
|[[GT Chip - Hydrax H5|Hydrax H5]] |
||
|- |
|- |
||
| − | ![[File:GTChipJokerJ5.png|100px]] |
+ | ![[File:GTChipJokerJ5.png|100px|link=Special:FilePath/GTChipJokerJ5.png]] |
|[[GT Chip - Joker J5|Joker J5]] |
|[[GT Chip - Joker J5|Joker J5]] |
||
|- |
|- |
||
| − | ![[File: |
+ | ![[File:GTChipKerbeusK5.png|100px|link=Special:FilePath/GTChipKerbeusK5.png]] |
| + | |[[GT Chip - Kerbeus K5|Kerbeus K5]] |
||
| + | |- |
||
| + | ![[File:GTChipKrakenK5.png|100px|link=Special:FilePath/GTChipKrakenK5.png]] |
||
|[[GT Chip - Kraken K5|Kraken K5]] |
|[[GT Chip - Kraken K5|Kraken K5]] |
||
|- |
|- |
||
| − | ![[File: |
+ | ![[File:GTChipLeviathanL5.png|100px]] |
| + | |[[GT Chip - Leviathan L5|Leviathan L5]] |
||
| + | |- |
||
| + | ![[File:GTChipLuinorL5.png|100px|link=Special:FilePath/GTChipLuinorL5.png]] |
||
|[[GT Chip - Luinor L5|Luinor L5]] |
|[[GT Chip - Luinor L5|Luinor L5]] |
||
|- |
|- |
||
| − | ![[File: |
+ | ![[File:GTChipOdaxO5.png|100px|link=Special:FilePath/GTChipOdaxO5.png]] |
| + | |[[GT Chip - Odax O5|Odax O5]] |
||
| + | |- |
||
| + | ![[File:GTChipOgreO5.png|100px]] |
||
| + | |[[GT Chip - Ogre O5|Ogre O5]] |
||
| + | |- |
||
| + | ![[File:GTChipPegasusP5.png|100px|link=Special:FilePath/GTChipPegasusP5.png]] |
||
| + | |[[GT Chip - Pegasus P5|Pegasus P5]] |
||
| + | |- |
||
| + | ![[File:GTChipSalamanderS5.png|100px|link=Special:FilePath/GTChipSalamanderS5.png]] |
||
| + | |[[GT Chip - Salamander S5|Salamander S5]] |
||
| + | |- |
||
| + | ![[File:GTChipSphinxS5.png|100px]] |
||
|[[GT Chip - Sphinx S5|Sphinx S5]] |
|[[GT Chip - Sphinx S5|Sphinx S5]] |
||
| + | |- |
||
| + | ![[File:GTChipSpryzenS5.png|100px|link=Special:FilePath/GTChipSpryzenS5.png]] |
||
| + | |[[GT Chip - Spryzen S5|Spryzen S5]] |
||
|- |
|- |
||
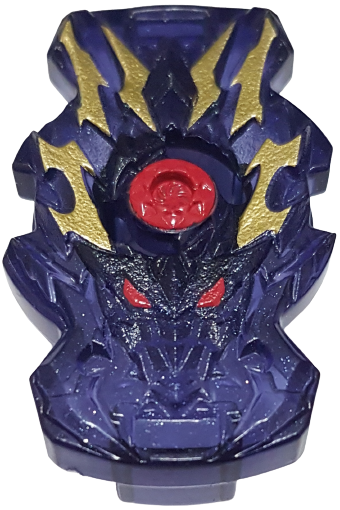
![[File:GTChipValtryekV5.png|100px]] |
![[File:GTChipValtryekV5.png|100px]] |
||
| Line 56: | Line 99: | ||
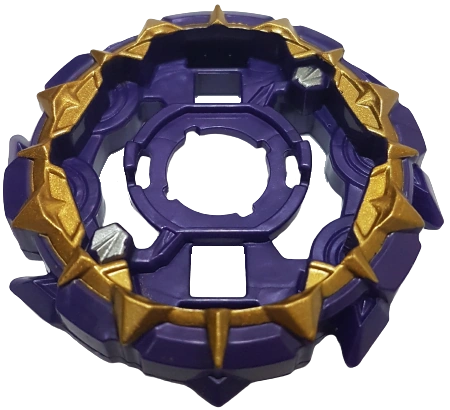
|[[Layer Base - Bushin (Hasbro)|Bushin]] |
|[[Layer Base - Bushin (Hasbro)|Bushin]] |
||
|- |
|- |
||
| − | ![[File: |
+ | ![[File:LayerBaseCommand.png|100px|link=Special:FilePath/LayerBaseCommand.png]] |
| + | |[[Layer Base - Command|Command]] |
||
| + | |- |
||
| + | ![[File:LayerBaseCosmic.png|100px|link=Special:FilePath/LayerBaseCosmic.png]] |
||
|[[Layer Base - Cosmic|Cosmic]] |
|[[Layer Base - Cosmic|Cosmic]] |
||
|- |
|- |
||
| Line 62: | Line 108: | ||
|[[Layer Base - Dusk|Dusk]] |
|[[Layer Base - Dusk|Dusk]] |
||
|- |
|- |
||
| − | ![[File: |
+ | ![[File:LayerBaseEclipse.png|100px]] |
| + | |[[Layer Base - Eclipse|Eclipse]] |
||
| + | |- |
||
| + | ![[File:LayerBaseEraseHasbro.png|100px|link=Special:FilePath/LayerBaseEraseHasbro.png]] |
||
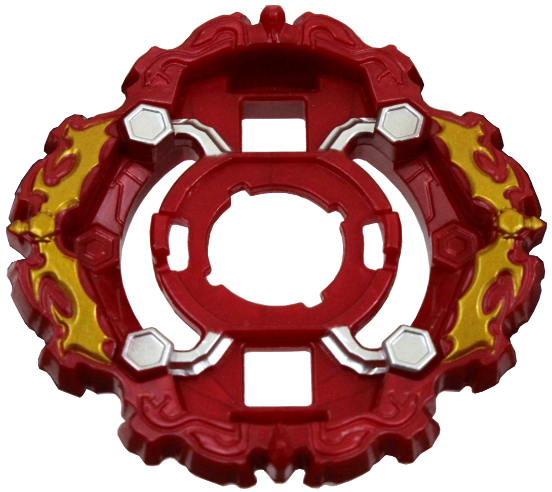
|[[Layer Base - Erase (Hasbro)|Erase]] |
|[[Layer Base - Erase (Hasbro)|Erase]] |
||
|- |
|- |
||
| − | ![[File: |
+ | ![[File:LayerBaseFlareHasbro.png|100px|link=Special:FilePath/LayerBaseFlareHasbro.png]] |
| + | |[[Layer Base - Flare (Hasbro)|Flare]] |
||
| + | |- |
||
| + | ![[File:LayerBaseGlyph.png|100px|link=Special:FilePath/LayerBaseGlyph.png]] |
||
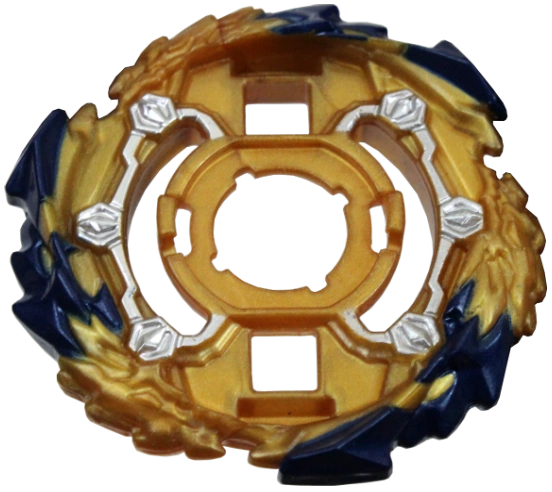
|[[Layer Base - Glyph|Glyph]] |
|[[Layer Base - Glyph|Glyph]] |
||
|- |
|- |
||
| − | ![[File: |
+ | ![[File:LayerBaseHarmony.png|100px|link=Special:FilePath/LayerBaseHarmony.png]] |
| − | |[[Layer Base - |
+ | |[[Layer Base - Harmony|Harmony]] |
|- |
|- |
||
| − | ![[File: |
+ | ![[File:LayerBaseInferno.png|100px|link=Special:FilePath/LayerBaseInferno.png]] |
| + | |[[Layer Base - Inferno|Inferno]] |
||
| + | |- |
||
| + | ![[File:LayerBaseJudgementHasbro.png|100px|link=Special:FilePath/LayerBaseJudgementHasbro.png]] |
||
| + | |[[Layer Base - Judgement (Hasbro)|Judgement]] |
||
| + | |- |
||
| + | ![[File:LayerBaseMasterHasbro.png|100px|link=Special:FilePath/LayerBaseMasterHasbro.png]] |
||
| + | |[[Layer Base - Master (Hasbro)|Master]] |
||
| + | |- |
||
| + | ![[File:LayerBaseMonster.png|100px]] |
||
| + | |[[Layer Base - Monster|Monster]] |
||
| + | |- |
||
| + | ![[File:LayerBaseMyth.png|100px|link=Special:FilePath/LayerBaseMyth.png]] |
||
| + | |[[Layer Base - Myth|Myth]] |
||
| + | |- |
||
| + | ![[File:LayerBaseLordHasbro.png|100px|link=Special:FilePath/LayerBaseLordHasbro.png]] |
||
| + | |[[Layer Base - Lord (Hasbro)|Lord]] |
||
| + | |- |
||
| + | ![[File:LayerBasePoisonHasbro.png|100px|link=Special:FilePath/LayerBasePoisonHasbro.png]] |
||
| + | |[[Layer Base - Poison (Hasbro)|Poison]] |
||
| + | |- |
||
| + | ![[File:LayerBasePrime.png|100px|link=Special:FilePath/LayerBasePrime.png]] |
||
| + | |[[Layer Base - Prime|Prime]] |
||
| + | |- |
||
| + | ![[File:LayerBaseRockHasbro.png|100px|link=Special:FilePath/LayerBaseRockHasbro.png]] |
||
|[[Layer Base - Rock (Hasbro)|Rock]] |
|[[Layer Base - Rock (Hasbro)|Rock]] |
||
| + | |- |
||
| + | ![[File:LayerBaseRoyal.png|100px|link=Special:FilePath/LayerBaseRoyal.png]] |
||
| + | |[[Layer Base - Royal|Royal]] |
||
| + | |- |
||
| + | ![[File:LayerBaseShield.png|100px|link=Special:FilePath/LayerBaseShield.png]] |
||
| + | |[[Layer Base - Shield|Shield]] |
||
|- |
|- |
||
![[File:LayerBaseSolar.png|100px]] |
![[File:LayerBaseSolar.png|100px]] |
||
| Line 80: | Line 162: | ||
|[[Layer Base - Sword|Sword]] |
|[[Layer Base - Sword|Sword]] |
||
|- |
|- |
||
| − | ![[File: |
+ | ![[File:LayerBaseTactHasbro.png|100px]] |
| + | |[[Layer Base - Tact (Hasbro)|Tact]] |
||
| + | |- |
||
| + | ![[File:LayerBaseUnionHasbro.png|100px|link=Special:FilePath/LayerBaseUnionHasbro.png]] |
||
| + | |[[Layer Base - Union (Hasbro)|Union]] |
||
| + | |- |
||
| + | ![[File:LayerBaseVenomHasbro.png|100px|link=Special:FilePath/LayerBaseVenomHasbro.png]] |
||
|[[Layer Base - Venom (Hasbro)|Venom]] |
|[[Layer Base - Venom (Hasbro)|Venom]] |
||
|- |
|- |
||
| Line 89: | Line 177: | ||
|[[Layer Base - Wizard (Hasbro)|Wizard]] |
|[[Layer Base - Wizard (Hasbro)|Wizard]] |
||
|- |
|- |
||
| − | ![[File:LayerBaseZone.png|100px]] |
+ | ![[File:LayerBaseZone.png|100px|link=Special:FilePath/LayerBaseZone.png]] |
|[[Layer Base - Zone|Zone]] |
|[[Layer Base - Zone|Zone]] |
||
|} |
|} |
||
| − | == |
+ | ==Layer Accessories== |
{| class="wikitable sortable" style="width:100%; text-align:center;" |
{| class="wikitable sortable" style="width:100%; text-align:center;" |
||
|- |
|- |
||
| − | ! style="width: |
+ | ! style="width:20%" |Image |
! style="width:40%" |Name |
! style="width:40%" |Name |
||
|- |
|- |
||
| − | + | |[[File:Union Sword (Hasbro).png|100px]] |
|
| + | |[[Union Sword (Hasbro)]] |
||
| − | |[[Energy Layer - Air Knight K5|Air Knight K5]] |
||
| − | |- |
||
| − | ![[File:LayerDullahanD5.png|100px]] |
||
| − | |[[Energy Layer - Dullahan D5|Dullahan D5]] |
||
| − | |- |
||
| − | ![[File:LayerGargoyleG5.png|100px]] |
||
| − | |[[Energy Layer - Gargoyle G5|Gargoyle G5]] |
||
| − | |- |
||
| − | ![[File:LayerLeftAstroA5.png|100px]] |
||
| − | |[[Energy Layer - Left Astro A5|Left Astro A5]] |
||
| − | |- |
||
| − | ![[File:LayerMorrignaM5.png|100px]] |
||
| − | |[[Energy Layer - Morrigna M5|Morrigna M5]] |
||
| − | |- |
||
| − | ![[File:LayerOgreO5.png|100px]] |
||
| − | |[[Energy Layer - Ogre O5|Ogre O5]] |
||
| − | |- |
||
| − | ![[File:LayerRightArtemisA5.png|100px]] |
||
| − | |[[Energy Layer - Right Artemis A5|Right Artemis A5]] |
||
| − | |- |
||
| − | ![[File:LayerRudrR5.png|100px]] |
||
| − | |[[Energy Layer - Rudr R5|Rudr R5]] |
||
|} |
|} |
||
| Line 133: | Line 200: | ||
|- |
|- |
||
!Bl |
!Bl |
||
| − | |[[File: |
+ | |[[File:DiscBlitzRender.png|100px]] |
|[[Forge Disc - Blitz (Hasbro)|Blitz]] |
|[[Forge Disc - Blitz (Hasbro)|Blitz]] |
||
|D69 |
|D69 |
||
| + | |- |
||
| + | !Cn |
||
| + | |[[File:DiscConvertRender.png|100px]] |
||
| + | |[[Forge Disc - Convert (Hasbro)|Convert]] |
||
| + | |D77 |
||
| + | |- |
||
| + | !Dr |
||
| + | |[[File:DiskDrakeHasbro.png|100px]] |
||
| + | |[[Forge Disc - Drake (Hasbro)|Drake]] |
||
| + | |D76 |
||
|- |
|- |
||
!Hr |
!Hr |
||
| Line 148: | Line 225: | ||
|- |
|- |
||
!P |
!P |
||
| − | |[[File: |
+ | |[[File:DiscPythonRender.png|100px]] |
|[[Forge Disc - Python|Python]] |
|[[Forge Disc - Python|Python]] |
||
|D74 |
|D74 |
||
| Line 158: | Line 235: | ||
|- |
|- |
||
!St |
!St |
||
| − | |[[File: |
+ | |[[File:DiscStingRender.png|100px]] |
|[[Forge Disc - Sting (Hasbro)|Sting]] |
|[[Forge Disc - Sting (Hasbro)|Sting]] |
||
|D72 |
|D72 |
||
| + | |- |
||
| + | !Sw |
||
| + | |[[File:DiskSwipe.png|100px]] |
||
| + | |[[Forge Disc - Swipe|Swipe]] |
||
| + | |D78 |
||
| + | |- |
||
| + | !Vn |
||
| + | |[[File:DiskVanguardHasbro.png|100px]] |
||
| + | |[[Forge Disc - Vanguard (Hasbro)|Vanguard]] |
||
| + | |D75 |
||
|} |
|} |
||
| Line 170: | Line 257: | ||
!Name |
!Name |
||
! style="width:20%" |Hasbro Part Code |
! style="width:20%" |Hasbro Part Code |
||
| + | |- |
||
| + | !Bn-H |
||
| + | |[[File:DriverBanshee-H.png|100px|link=Special:FilePath/DriverBanshee-H.png]] |
||
| + | |[[Performance Tip - Banshee-H|Banshee-H]] |
||
| + | |TH17 |
||
| + | |- |
||
| + | !Bl I-H |
||
| + | |[[File:DriverBullet1-H.png|100px|link=Special:FilePath/DriverBullet1-H.png]] |
||
| + | |[[Performance Tip - Bullet I-H|Bullet I-H]] |
||
| + | |TH11 |
||
| + | |- |
||
| + | !Bl II-H |
||
| + | |[[File:DriverBullet2-H.png|100px|link=Special:FilePath/DriverBullet2-H.png]] |
||
| + | |[[Performance Tip - Bullet II-H|Bullet II-H]] |
||
| + | |TH18 |
||
|- |
|- |
||
!Ch I-H |
!Ch I-H |
||
| Line 177: | Line 279: | ||
|- |
|- |
||
!Ch II-H |
!Ch II-H |
||
| − | |[[File:DriverCharge2-H.png|100px]] |
+ | |[[File:DriverCharge2-H.png|100px|link=Special:FilePath/DriverCharge2-H.png]] |
|[[Performance Tip - Charge II-H|Charge II-H]] |
|[[Performance Tip - Charge II-H|Charge II-H]] |
||
|TH14 |
|TH14 |
||
|- |
|- |
||
| + | !Ch III-H |
||
| − | !N/A |
||
| + | |[[File:DriverCharge3-H.png|100px|link=Special:FilePath/DriverCharge3-H.png]] |
||
| + | |[[Performance Tip - Charge III-H|Charge III-H]] |
||
| + | |TH10 |
||
| + | |- |
||
| + | !Cl-H |
||
|[[File:DriverCoil-H.png|100px]] |
|[[File:DriverCoil-H.png|100px]] |
||
|[[Performance Tip - Coil-H|Coil-H]] |
|[[Performance Tip - Coil-H|Coil-H]] |
||
|TH15 |
|TH15 |
||
|- |
|- |
||
| + | !Ds-H |
||
| − | !N/A |
||
| − | |[[File: |
+ | |[[File:DriverDestroyer-H.png|100px|link=Special:FilePath/DriverDestroyer-H.png]] |
| + | |[[Performance Tip - Destroyer-H|Destroyer-H]] |
||
| + | |TH26 |
||
| + | |- |
||
| + | !Dm-H |
||
| + | |[[File:DriverDimensional-H.png|100px|link=Special:FilePath/DriverDimensional-H.png]] |
||
| + | |[[Performance Tip - Dimensional-H|Dimensional-H]] |
||
| + | |TH21 |
||
| + | |- |
||
| + | !Fr-H |
||
| + | |[[File:DriverFriction-H.png|100px]] |
||
| + | |[[Performance Tip - Friction-H|Friction-H]] |
||
| + | |TH27 |
||
| + | |- |
||
| + | !Gn-H |
||
| + | |[[File:DriverGenerate-H.png|100px|link=Special:FilePath/DriverGenerate-H.png]] |
||
| + | |[[Performance Tip - Generate-H|Generate-H]] |
||
| + | |TH28-F |
||
| + | |- |
||
| + | !Gr-H |
||
| + | |[[File:DriverGuardian-H.png|100px|link=Special:FilePath/DriverGuardian-H.png]] |
||
| + | |[[Performance Tip - Guardian-H|Guardian-H]] |
||
| + | |TH30 |
||
| + | |- |
||
| + | !Hy-H |
||
| + | |[[File:DriverHybrid-H.png|100px|link=Special:FilePath/DriverHybrid-H.png]] |
||
| + | |[[Performance Tip - Hybrid-H|Hybrid-H]] |
||
| + | |TH20 |
||
| + | |- |
||
| + | !Ig-H |
||
| + | |[[File:DriverIgnition-H.png|100px|link=Special:FilePath/DriverIgnition-H.png]] |
||
| + | |[[Performance Tip - Ignition-H|Ignition-H]] |
||
| + | |TH23-F |
||
| + | |- |
||
| + | !J-H |
||
| + | |[[File:DriverJagged-H.png|100px|link=Special:FilePath/DriverJagged-H.png]] |
||
|[[Performance Tip - Jagged-H|Jagged-H]] |
|[[Performance Tip - Jagged-H|Jagged-H]] |
||
|TH01 |
|TH01 |
||
| Line 196: | Line 338: | ||
|TH07 |
|TH07 |
||
|- |
|- |
||
| + | !Ln-H |
||
| − | !N/A |
||
|[[File:DriverLinear-H.png|100px]] |
|[[File:DriverLinear-H.png|100px]] |
||
|[[Performance Tip - Linear-H|Linear-H]] |
|[[Performance Tip - Linear-H|Linear-H]] |
||
|TH03 |
|TH03 |
||
| + | |- |
||
| + | !Lw-H |
||
| + | |[[File:DriverLow-H.png|100px|link=Special:FilePath/DriverLow-H.png]] |
||
| + | |[[Performance Tip - Low-H|Low-H]] |
||
| + | |TH13 |
||
| + | |- |
||
| + | !Ω-H |
||
| + | |[[File:DriverOctave-H.png|100px|link=Special:FilePath/DriverOctave-H.png]] |
||
| + | |[[Performance Tip - Octave-H|Octave-H]] |
||
| + | |TH22 |
||
| + | |- |
||
| + | !O-H |
||
| + | |[[File:DriverOrbital-H.png|100px]] |
||
| + | |[[Performance Tip - Orbital-H|Orbital-H]] |
||
| + | |TH16 |
||
| + | |- |
||
| + | !Pl-H |
||
| + | |[[File:DriverPlanetary-H.png|100px|link=Special:FilePath/DriverPlanetary-H.png]] |
||
| + | |[[Performance Tip - Planetary-H|Planetary-H]] |
||
| + | |TH31 |
||
|- |
|- |
||
!Pw-H |
!Pw-H |
||
| − | |[[File:DriverPower-H.png|100px]] |
+ | |[[File:DriverPower-H.png|100px|link=Special:FilePath/DriverPower-H.png]] |
|[[Performance Tip - Power-H|Power-H]] |
|[[Performance Tip - Power-H|Power-H]] |
||
|TH05 |
|TH05 |
||
| + | |- |
||
| + | !R-H |
||
| + | |[[File:DriverRevolver-H.png|100px|link=Special:FilePath/DriverRevolver-H.png]] |
||
| + | |[[Performance Tip - Revolver-H|Revolver-H]] |
||
| + | |TH19 |
||
|- |
|- |
||
!Rs-H |
!Rs-H |
||
| Line 211: | Line 378: | ||
|TH06 |
|TH06 |
||
|- |
|- |
||
| + | !Sp-H |
||
| − | !N/A |
||
| − | |[[File: |
+ | |[[File:DriverSpiro-H.png|100px|link=Special:FilePath/DriverSpiro-H.png]] |
| + | |[[Performance Tip - Spiro-H|Spiro-H]] |
||
| + | |TH04 |
||
| + | |- |
||
| + | !Tr-H |
||
| + | |[[File:DriverTrick-H.png|100px|link=Special:FilePath/DriverTrick-H.png]] |
||
| + | |[[Performance Tip - Trick-H|Trick-H]] |
||
| + | |TH09 |
||
| + | |- |
||
| + | !Ul-H |
||
| + | |[[File:DriverUltimateReboot-H.png|100px|link=Special:FilePath/DriverUltimateReboot-H.png]] |
||
| + | |[[Performance Tip - Ultimate Reboot-H|Ultimate Reboot-H]] |
||
| + | |TH24 |
||
| + | |- |
||
| + | !Vl-H |
||
| + | |[[File:DriverValor-H.png|100px|link=Special:FilePath/DriverValor-H.png]] |
||
|[[Performance Tip - Valor-H|Valor-H]] |
|[[Performance Tip - Valor-H|Valor-H]] |
||
|TH02 |
|TH02 |
||
| + | |- |
||
| + | !Xt-H |
||
| + | |[[File:DriverXtender-H.png|100px|link=Special:FilePath/DriverXtender-H.png]] |
||
| + | |[[Performance Tip - Xtender-H|Xtender-H]] |
||
| + | |TH12 |
||
| + | |- |
||
| + | !Yr-H |
||
| + | |[[File:DriverYardage-H.png|100px|link=Special:FilePath/DriverYardage-H.png]] |
||
| + | |[[Performance Tip - Yardage-H|Yardage-H]] |
||
| + | |TH25 |
||
| + | |- |
||
| + | !Z-H |
||
| + | |[[File:DriverZephyrus-H.png|100px|link=Special:FilePath/DriverZephyrus-H.png]] |
||
| + | |[[Performance Tip - Zephyrus-H|Zephyrus-H]] |
||
| + | |TH29 |
||
|} |
|} |
||
| − | |||
{{Burst Navbox}} |
{{Burst Navbox}} |
||
| + | [[Category:Lists]] |
||
| + | [[Category:Parts Lists]] |
||
Latest revision as of 17:57, 22 November 2023
- This article is about parts included within the HyperSphere System, a subsystem of the Burst System. For parts included within the Gatinko Layer System, see List of Gatinko Layer System parts.
GT Chips


Layer Bases


Layer Accessories
| Image | Name |
|---|---|
| File:Union Sword (Hasbro).png | Union Sword (Hasbro) |
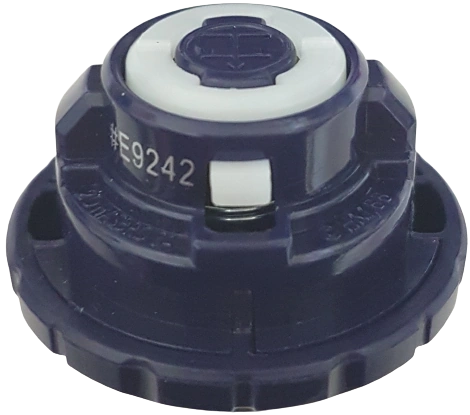
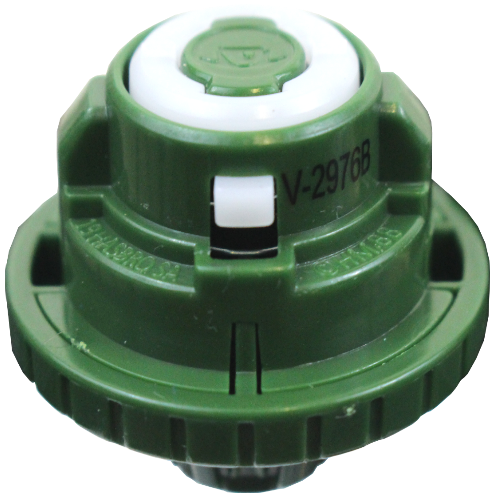
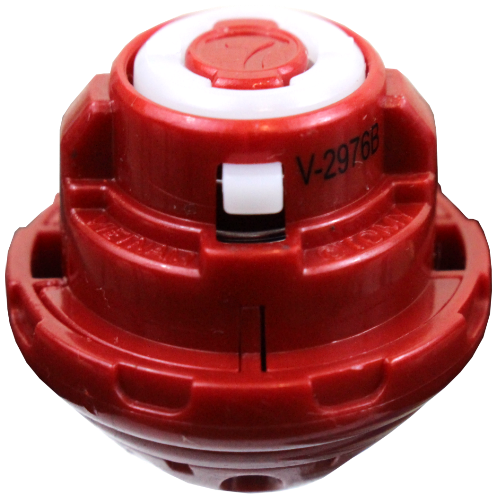
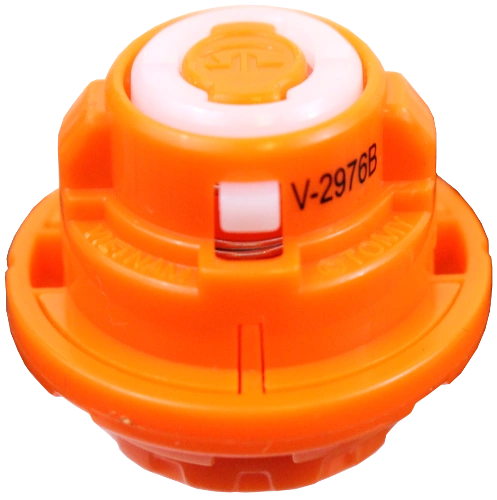
Forge Discs
| Abbr. | Image | Name | Hasbro Part Code |
|---|---|---|---|
| Bl | 
|
Blitz | D69 |
| Cn | 
|
Convert | D77 |
| Dr | File:DiskDrakeHasbro.png | Drake | D76 |
| Hr | 
|
Hurricane | D71 |
| L | 
|
Lore | D73 |
| P | 
|
Python | D74 |
| Rt | 
|
Ratchet | D70 |
| St | 
|
Sting | D72 |
| Sw | 
|
Swipe | D78 |
| Vn | 
|
Vanguard | D75 |
Performance Tips


.png)
| |||||||||||||||||