m (Protected "Performance Tip - Jolt" ([edit=sysop] (indefinite) [move=sysop] (indefinite))) |
(Reworked overall section and removed some excess wording) Tag: Visual edit |
||
| Line 16: | Line 16: | ||
<onlyinclude>'''Jolt''' features a rubber flat tip with six spikes protruding outwards and towards the right, akin to Left Rubber Flat from Metal Fight Beyblade or a mix between [[Performance Tip - Spiral|Spiral]] and [[Performance Tip - Xtreme|Xtreme]]. |
<onlyinclude>'''Jolt''' features a rubber flat tip with six spikes protruding outwards and towards the right, akin to Left Rubber Flat from Metal Fight Beyblade or a mix between [[Performance Tip - Spiral|Spiral]] and [[Performance Tip - Xtreme|Xtreme]]. |
||
| − | Due to the surface area to friction ratio, '''Jolt''' will create a highly aggressive, and if launched with a Banking Shoot, somewhat easily controllable movement pattern. In terms of speed, the greater surface area given by the spikes makes '''Jolt''' faster than [[Performance Tip - Xtreme|Xtreme]] and as fast as [[Performance Tip - Merge|Merge]]. '''Jolt'''’s high speed allows for strong attacks and its high friction creates less chances of losing a Banking Pattern in battle, |
+ | Due to the surface area to friction ratio, '''Jolt''' will create a highly aggressive, and if launched with a Banking Shoot, somewhat easily controllable movement pattern. In terms of speed, the greater surface area given by the spikes makes '''Jolt''' faster than [[Performance Tip - Xtreme|Xtreme]] and as fast as [[Performance Tip - Merge|Merge]]. '''Jolt'''’s high speed allows for strong attacks and its high friction creates less chances of losing a Banking Pattern in battle, which would make it one of the better choices for Attack Combinations. |
However, '''Jolt''' has four major weaknesses. Firstly, the high friction of the rubber means that '''Jolt''' has incredibly low Stamina, furthermore, the light weight of the Burst System compared to previous Systems means that there is less inertia, exacerbating the Stamina issue further. Secondly, the high friction also means that '''Jolt''' resists changes to the Beyblade's spin from contact with the opponent, thus more force is transferred the teeth in Takara Tomy Layers, increasing the chances of Self-Bursts. Third, '''Jolt''' features a slightly weak spring lock, further exacerbating the risk of Self-Bursts. Lastly, '''Jolt''' will wear down with use. While this can create an initial benefit in speed from the tip fitting into the curvature of the Stadium, heavy use will decrease its aggression with little to no improvement to the tip's Stamina, meaning that multiple copies much be purchased in order to replace worn ones. |
However, '''Jolt''' has four major weaknesses. Firstly, the high friction of the rubber means that '''Jolt''' has incredibly low Stamina, furthermore, the light weight of the Burst System compared to previous Systems means that there is less inertia, exacerbating the Stamina issue further. Secondly, the high friction also means that '''Jolt''' resists changes to the Beyblade's spin from contact with the opponent, thus more force is transferred the teeth in Takara Tomy Layers, increasing the chances of Self-Bursts. Third, '''Jolt''' features a slightly weak spring lock, further exacerbating the risk of Self-Bursts. Lastly, '''Jolt''' will wear down with use. While this can create an initial benefit in speed from the tip fitting into the curvature of the Stadium, heavy use will decrease its aggression with little to no improvement to the tip's Stamina, meaning that multiple copies much be purchased in order to replace worn ones. |
||
| − | '''Jolt''' is slightly shorter than most Tips, this reduction in height is meant to improve Attack potential by striking the opponent’s Layer from an upwards angle, creating Destabilization potential. However, the |
+ | '''Jolt''' is slightly shorter than most Tips, this reduction in height is meant to improve Attack potential by striking the opponent’s Layer from an upwards angle, creating Destabilization potential. However, the height of most Layers and the negligible difference between '''Jolt'''<nowiki/>'s height and the height of most other Drivers mitigates the Destabilization potential. |
The direction of '''Jolt'''’s rubber spikes are meant to, in theory, create greater speeds in Left-Spin Combinations. In practice however, there is little discernible difference in movement speed between Left-Spin and Right-Spin.</onlyinclude> |
The direction of '''Jolt'''’s rubber spikes are meant to, in theory, create greater speeds in Left-Spin Combinations. In practice however, there is little discernible difference in movement speed between Left-Spin and Right-Spin.</onlyinclude> |
||
==Overall== |
==Overall== |
||
| − | '''Jolt''' is one of the fastest, most aggressive and easier to control tips in the game but is plagued by low Stamina and high Burst risk. |
+ | '''Jolt''' is one of the fastest, most aggressive and easier to control tips in the game but is plagued by low Stamina and high Burst risk. As such, '''Jolt''' is outclassed by [[Performance Tip - Xtreme|Xtreme]], [[Performance Tip - Xtreme'|Xtreme']] and [[Performance Tip - Jolt'|Jolt']] in pure Attack combinations. |
| − | ''' |
+ | '''Despite this, Jolt is still a welcome addition to any blader's collection.'''<nowiki/> |
==Products== |
==Products== |
||
Revision as of 17:10, 9 April 2019
| Standard | SlingShock |
|---|
Jolt (ジョルト, Joruto) is a Performance Tip released as part of the Burst System as well as the Cho-Z Layer System. It debuted with the release of the B-110 Starter Bloody Longinus 13 Jolt on April 28th, 2018.
Description
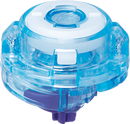
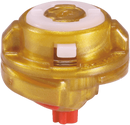
Jolt features a rubber flat tip with six spikes protruding outwards and towards the right, akin to Left Rubber Flat from Metal Fight Beyblade or a mix between Spiral and Xtreme.
Due to the surface area to friction ratio, Jolt will create a highly aggressive, and if launched with a Banking Shoot, somewhat easily controllable movement pattern. In terms of speed, the greater surface area given by the spikes makes Jolt faster than Xtreme and as fast as Merge. Jolt’s high speed allows for strong attacks and its high friction creates less chances of losing a Banking Pattern in battle, which would make it one of the better choices for Attack Combinations.
However, Jolt has four major weaknesses. Firstly, the high friction of the rubber means that Jolt has incredibly low Stamina, furthermore, the light weight of the Burst System compared to previous Systems means that there is less inertia, exacerbating the Stamina issue further. Secondly, the high friction also means that Jolt resists changes to the Beyblade's spin from contact with the opponent, thus more force is transferred the teeth in Takara Tomy Layers, increasing the chances of Self-Bursts. Third, Jolt features a slightly weak spring lock, further exacerbating the risk of Self-Bursts. Lastly, Jolt will wear down with use. While this can create an initial benefit in speed from the tip fitting into the curvature of the Stadium, heavy use will decrease its aggression with little to no improvement to the tip's Stamina, meaning that multiple copies much be purchased in order to replace worn ones.
Jolt is slightly shorter than most Tips, this reduction in height is meant to improve Attack potential by striking the opponent’s Layer from an upwards angle, creating Destabilization potential. However, the height of most Layers and the negligible difference between Jolt's height and the height of most other Drivers mitigates the Destabilization potential.
The direction of Jolt’s rubber spikes are meant to, in theory, create greater speeds in Left-Spin Combinations. In practice however, there is little discernible difference in movement speed between Left-Spin and Right-Spin.
Overall
Jolt is one of the fastest, most aggressive and easier to control tips in the game but is plagued by low Stamina and high Burst risk. As such, Jolt is outclassed by Xtreme, Xtreme' and Jolt' in pure Attack combinations.
Despite this, Jolt is still a welcome addition to any blader's collection.
Products
Takara Tomy
- B-110 Bloody Longinus 13 Jolt
- B-00 Bloody Longinus 13 Jolt (Gold Dragon Ver.)
Gallery
Takara Tomy
Hasbro


