Ganj (Message Wall | contribs) (Blog post created or updated.) |
Ganj (Message Wall | contribs) (Blog post created or updated.) |
||
| (35 intermediate revisions by the same user not shown) | |||
| Line 4: | Line 4: | ||
The <b><i>Beyblade Burst™ Performance Top System™</i></b> is the official name for the third-generation of [[Beyblade (toy)|Beyblade tops]] released by [[Hasbro]]. All Beyblade Burst™ tops include a dynamic “<b><span style="color: #ff944d; text-shadow: 0 0 1px #000000, 0 0 1px #000000, 0 0 1px #000000;">Burst</span></b>” feature designed to burst into pieces during battle. Originally released in Japan on July 18th of 2015 by [[Tomy Company LTD.|Takara Tomy]] as the [[File:BB system logo.png|15px]] <i>Burst System™</i>, Hasbro began worldwide distribution of Beyblade Burst™ products in September of 2016 under the name <i>Beyblade Burst™ Performance Top System™</i>. |
The <b><i>Beyblade Burst™ Performance Top System™</i></b> is the official name for the third-generation of [[Beyblade (toy)|Beyblade tops]] released by [[Hasbro]]. All Beyblade Burst™ tops include a dynamic “<b><span style="color: #ff944d; text-shadow: 0 0 1px #000000, 0 0 1px #000000, 0 0 1px #000000;">Burst</span></b>” feature designed to burst into pieces during battle. Originally released in Japan on July 18th of 2015 by [[Tomy Company LTD.|Takara Tomy]] as the [[File:BB system logo.png|15px]] <i>Burst System™</i>, Hasbro began worldwide distribution of Beyblade Burst™ products in September of 2016 under the name <i>Beyblade Burst™ Performance Top System™</i>. |
||
| − | |||
| ⚫ | |||
==<b><i>What is the Beyblade Burst™ Performance Top System™?</i></b>== |
==<b><i>What is the Beyblade Burst™ Performance Top System™?</i></b>== |
||
| − | Takara Tomy's <i>Burst System™</i> and, by extension, Hasbro's <i>Beyblade Burst™ Performance Top System™</i> is the |
+ | Takara Tomy's <i>Burst System™</i> and, by extension, Hasbro's <i>Beyblade Burst™ Performance Top System™</i> is the archetype for [[Generation 3]] [[Beyblade (toy)|Beyblade tops]] using a three-components modular system. Players (called [[Bladers| |
<b><span style="color: #ffe633; text-shadow: 0 0 1px #000000, 0 0 1px #000000, 0 0 1px #000000;">Bladers</span></b>]]) can select and customize the [[Beyblade (toy)| |
<b><span style="color: #ffe633; text-shadow: 0 0 1px #000000, 0 0 1px #000000, 0 0 1px #000000;">Bladers</span></b>]]) can select and customize the [[Beyblade (toy)| |
||
<b><span style="color: #ffe633; text-shadow: 0 0 1px #000000, 0 0 1px #000000, 0 0 1px #000000;">Beys</span></b>]] similar to previous Beyblade generations and systems using three components to engage in -one-on-one combat, and can choose to switch between them between "Battles". The system features the innovative “<b><span style="color: #ff944d; text-shadow: 0 0 1px #000000, 0 0 1px #000000, 0 0 1px #000000;">Burst</span></b>” feature which adds a new gameplay dynamic alongside the traditional “[[Beyblade Burst#How to Win|Spin Finish]]” and “[[Beyblade Burst#How to Win|Over Finish]]”. With the “<b><span style="color: #ff944d; text-shadow: 0 0 1px #000000, 0 0 1px #000000, 0 0 1px #000000;">Burst</span></b>” feature, a Beyblade Burst top can burst into pieces during a battle, resulting in a “[[Beyblade Burst#How to Win|Burst Finish]]”. This innovation was designed to increase excitement with the possibility of more exhilarating battles. |
<b><span style="color: #ffe633; text-shadow: 0 0 1px #000000, 0 0 1px #000000, 0 0 1px #000000;">Beys</span></b>]] similar to previous Beyblade generations and systems using three components to engage in -one-on-one combat, and can choose to switch between them between "Battles". The system features the innovative “<b><span style="color: #ff944d; text-shadow: 0 0 1px #000000, 0 0 1px #000000, 0 0 1px #000000;">Burst</span></b>” feature which adds a new gameplay dynamic alongside the traditional “[[Beyblade Burst#How to Win|Spin Finish]]” and “[[Beyblade Burst#How to Win|Over Finish]]”. With the “<b><span style="color: #ff944d; text-shadow: 0 0 1px #000000, 0 0 1px #000000, 0 0 1px #000000;">Burst</span></b>” feature, a Beyblade Burst top can burst into pieces during a battle, resulting in a “[[Beyblade Burst#How to Win|Burst Finish]]”. This innovation was designed to increase excitement with the possibility of more exhilarating battles. |
||
| Line 42: | Line 40: | ||
Unlike the previous generation of Beyblade tops, BEYBLADE BURST™ tops do not require an <i>Assembly Tool</i> to assemble them. Instead, this generation of Beyblade tops follows a similar process to first-generation Beyblade systems. |
Unlike the previous generation of Beyblade tops, BEYBLADE BURST™ tops do not require an <i>Assembly Tool</i> to assemble them. Instead, this generation of Beyblade tops follows a similar process to first-generation Beyblade systems. |
||
| + | <!--Placeholder--> |
||
| − | |||
| − | <!-- |
||
===<b><i>How to Assemble a Beyblade Burst Top</i></b>=== |
===<b><i>How to Assemble a Beyblade Burst Top</i></b>=== |
||
| + | <h2 style="background-color:; border: 1px solid #aaaaaa; -moz-border-radius: 7px; -khtml-border-radius: 7px; -webkit-border-radius: 7px; border-radius: 7px; color: #000; text-align: left; font-weight:; font-size: 100%; padding: 0.2em 0.4em; margin-top: 0;">{{{text| |
||
| − | #Fit the socket of the [[Forge Disc|Disc]] with the head of the [[Performance Tip (Beyblade Burst)|Driver]]. |
||
| + | #Align and stack the [[Energy Layer|<span style="color: #ffe633; text-shadow: 0 0 1px #000000, 0 0 1px #000000, 0 0 1px #000000;">Energy Layer</span>]] on top of the [[Forge Disc|<span style="color: #ffe633; text-shadow: 0 0 1px #000000, 0 0 1px #000000, 0 0 1px #000000;">Forge Disc</span>]] using the slots of the [[Energy Layer|<span style="color: #ffe633; text-shadow: 0 0 1px #000000, 0 0 1px #000000, 0 0 1px #000000;">Energy Layer</span>]] and the tab-like Stoppers on the [[Forge Disc|<span style="color: #ffe633; text-shadow: 0 0 1px #000000, 0 0 1px #000000, 0 0 1px #000000;">Forge Disc</span>]]. (※ The Stoppers should be positioned at the middle of the slot lanes while stacking.) |
||
| − | #Fit the slots of the [[Energy Layer|Layer]] with the [[Forge Disc|Disc]]'s Stoppers. |
||
| + | #Align and stack the [[Energy Layer|<span style="color: #ffe633; text-shadow: 0 0 1px #000000, 0 0 1px #000000, 0 0 1px #000000;">Energy Layer</span>]] and [[Forge Disc|<span style="color: #ffe633; text-shadow: 0 0 1px #000000, 0 0 1px #000000, 0 0 1px #000000;">Forge Disc</span>]] combination onto the head of the [[Performance Tip (Beyblade Burst)|<span style="color: #ffe633; text-shadow: 0 0 1px #000000, 0 0 1px #000000, 0 0 1px #000000;">Performance Tip</span>]] using the socket-like underside of the [[Forge Disc|<span style="color: #ffe633; text-shadow: 0 0 1px #000000, 0 0 1px #000000, 0 0 1px #000000;">Forge Disc</span>]] until properly fit. |
||
| − | #Press and hold the parts together while rotating the [[Energy Layer|Layer]] counterclockwise until firmly. The Stoppers on the [[Forge Disc|Disc]] should reach the ends of the slots on the [[Energy Layer|Layer]]. |
||
| ⚫ | #Adjust the [[Energy Layer|<span style="color: #ffe633; text-shadow: 0 0 1px #000000, 0 0 1px #000000, 0 0 1px #000000;">Energy Layer</span>]] to align with the grooves of the [[Performance Tip (Beyblade Burst)|<span style="color: #ffe633; text-shadow: 0 0 1px #000000, 0 0 1px #000000, 0 0 1px #000000;">Performance Tip</span>]]'s center, spring pad. |
||
| + | #With all components properly aligned, press and hold the components together while twisting the [[Energy Layer|<span style="color: #ffe633; text-shadow: 0 0 1px #000000, 0 0 1px #000000, 0 0 1px #000000;">Energy Layer</span>]] counterclockwise (or clockwise, for {{Spin icon|BB Left Spin HB}} [[Energy Layer|<span style="color: #ffe633; text-shadow: 0 0 1px #000000, 0 0 1px #000000, 0 0 1px #000000;">Energy Layers</span>]]) until firmly secured. The stoppers on the [[Forge Disc|<span style="color: #ffe633; text-shadow: 0 0 1px #000000, 0 0 1px #000000, 0 0 1px #000000;">Forge Disc</span>]] should reach the ends of the slots on the [[Energy Layer|<span style="color: #ffe633; text-shadow: 0 0 1px #000000, 0 0 1px #000000, 0 0 1px #000000;">Energy Layer</span>]].}}}</h2> |
||
| + | Assembling a <b>BEYBLADE BURST™ top</b> follows a similar procedure as <b>Generation 1 Beyblades</b>, which requires a twisting action and without the need for additional tools. When properly followed, the process also prepares the "<b><span style="color: #ff944d; text-shadow: 0 0 1px #000000, 0 0 1px #000000, 0 0 1px #000000;">Burst</span></b>" feature. During the fourth step of assembly, with all components being pressed together, both the [[Energy Layer|<span style="color: #ffe633; text-shadow: 0 0 1px #000000, 0 0 1px #000000, 0 0 1px #000000;">Energy Layer</span>]] and [[Forge Disc|<span style="color: #ffe633; text-shadow: 0 0 1px #000000, 0 0 1px #000000, 0 0 1px #000000;">Forge Disc</span>]] interact with elements of the [[Performance Tip (Beyblade Burst)|<span style="color: #ffe633; text-shadow: 0 0 1px #000000, 0 0 1px #000000, 0 0 1px #000000;">Performance Tip</span>]] in distinct fashions, with the [[Energy Layer|<span style="color: #ffe633; text-shadow: 0 0 1px #000000, 0 0 1px #000000, 0 0 1px #000000;">Energy Layer</span>]] engaging with the circular, spring pad (located on the top of the [[Performance Tip (Beyblade Burst)|<span style="color: #ffe633; text-shadow: 0 0 1px #000000, 0 0 1px #000000, 0 0 1px #000000;">Performance Tip</span>]]) while the [[Forge Disc|<span style="color: #ffe633; text-shadow: 0 0 1px #000000, 0 0 1px #000000, 0 0 1px #000000;">Forge Disc</span>]] engages with the two tabs (located on the sides of the head of the [[Performance Tip (Beyblade Burst)|<span style="color: #ffe633; text-shadow: 0 0 1px #000000, 0 0 1px #000000, 0 0 1px #000000;">Performance Tip</span>]]). This interaction causes these elements to slide down, compressing the spring coil inside the [[Performance Tip (Beyblade Burst)|<span style="color: #ffe633; text-shadow: 0 0 1px #000000, 0 0 1px #000000, 0 0 1px #000000;">Performance Tip</span>]] as the components are set and locked, priming the "<b><span style="color: #ff944d; text-shadow: 0 0 1px #000000, 0 0 1px #000000, 0 0 1px #000000;">Burst</span></b>" feature. |
||
| − | Assembling a Beyblade Burst top simply requires players to assemble the necessary components correctly: (1) placing the [[Forge Disc|Disc]] on the [[Performance Tip (Beyblade Burst)|Driver]], (2) aligning the slots of the [[Energy Layer|Layer]] with the Stoppers of the [[Forge Disc|Disc]] and attaching the [[Energy Layer|Layer]] to the [[Performance Tip (Beyblade Burst)|Driver]] using the grooves at the center of the [[Performance Tip (Beyblade Burst)|Driver]], (3) then turning the [[Energy Layer|Layer]] left (or right, for {{Spin icon|BB Left Spin HB}} [[Energy Layer|Layers]]) until firmly secured. |
||
| + | During assembly, the [[Energy Layer|<span style="color: #ffe633; text-shadow: 0 0 1px #000000, 0 0 1px #000000, 0 0 1px #000000;">Energy Layers</span>]] clicks while being twisted into place. These "clicks" are caused by the interaction between the [[Energy Layer|<span style="color: #ffe633; text-shadow: 0 0 1px #000000, 0 0 1px #000000, 0 0 1px #000000;">Energy Layers</span>]]'s teeth (located on the underside of the [[Energy Layer|<span style="color: #ffe633; text-shadow: 0 0 1px #000000, 0 0 1px #000000, 0 0 1px #000000;">Energy Layers</span>]]) sliding over the [[Performance Tip (Beyblade Burst)|<span style="color: #ffe633; text-shadow: 0 0 1px #000000, 0 0 1px #000000, 0 0 1px #000000;">Performance Tip</span>]]'s spring pad and can be used to gauge the progress of a fully-assembled Beyblade approaching "<b><span style="color: #ff944d; text-shadow: 0 0 1px #000000, 0 0 1px #000000, 0 0 1px #000000;">Burst</span></b>" activation. As the Layer is hit during battle, it will become progressively unscrewed from the [[Performance Tip (Beyblade Burst)|<span style="color: #ffe633; text-shadow: 0 0 1px #000000, 0 0 1px #000000, 0 0 1px #000000;">Performance Tip</span>]]. When the [[Energy Layer|<span style="color: #ffe633; text-shadow: 0 0 1px #000000, 0 0 1px #000000, 0 0 1px #000000;">Energy Layers</span>]] becomes completely loosened, the coil spring inside the [[Performance Tip (Beyblade Burst)|<span style="color: #ffe633; text-shadow: 0 0 1px #000000, 0 0 1px #000000, 0 0 1px #000000;">Performance Tip</span>]] is released, sending the [[Forge Disc|<span style="color: #ffe633; text-shadow: 0 0 1px #000000, 0 0 1px #000000, 0 0 1px #000000;">Forge Disc</span>]] and [[Energy Layer|<span style="color: #ffe633; text-shadow: 0 0 1px #000000, 0 0 1px #000000, 0 0 1px #000000;">Energy Layers</span>]] flying in an explosive finish. |
||
| − | Assembling a Beyblade Burst top follows a similar process as first-generation Beyblades (before the [[Hard Metal System]]). The first step requires aligning the grooves of the [[Forge Disc|Disc]] with the head and shoulders of the [[Performance Tip (Beyblade Burst)|Driver]] and set it in place. The second step requires that the [[Energy Layer|Layer]] be placed on top of the [[Forge Disc|Disc]] by aligning the slots of the Layer with the Stoppers of the Disc. The third step presses the Layer and Disc components down onto the Driver then firmly locking all components together by twisting the Layer until the Stoppers on the Disc reach the ends of the slots on the Layer. This process also prepares the "Burst" feature. During the second and third step of assembly, while the components are being set, the Layer and Disc engage the circular, white spring pad (red, for Dash Drivers) and two tabs, located on the top and sides of the head of the [[Performance Tip (Beyblade Burst)|Driver]] respectively, that slides down, compressing the spring coil inside the Driver as the components are set and locked, priming the "Burst" feature. |
||
| − | |||
| − | During assembly, the [[Energy Layer|Layers]] clicks while being twisted into place. These "clicks" are caused by the interaction between the [[Energy Layer|Layers]]'s teeth (located on the underside of the [[Energy Layer|Layer]]) sliding over the [[Performance Tip (Beyblade Burst)|Driver]]'s spring pad and can be used to gauge the progress of a fully-assembled Beyblade approaching "Burst" activation. As the Layer is hit during battle, it will become progressively unscrewed from the [[Performance Tip (Beyblade Burst)|Driver]]. When the Beyblade [[Energy Layer|Layers]] becomes completely loosened, the coil spring inside the [[Performance Tip (Beyblade Burst)|Driver]] is released sending the [[Forge Disc|Disc]] and [[Energy Layer|Layer]] flying in an explosive finish.--> |
||
| − | |||
| − | ==<b><i>Beyblade Burst™ Top Types</i></b>== |
||
| − | Every top belongs to one of four combat categories (called [[Type]]s), based on its primary battle strength. During battle, the [[Type#Type Affinity|Type Affinity]] of the competing Beys will determine how efficiently they battle each other, with the one holding an advantage effectively neutralizing the battle tactics of the other. |
||
| ⚫ | |||
| ⚫ | |||
| ⚫ | |||
| − | | style="width: 90%;"|<span style="color: black; text-shadow: 0 0 2px #FFFFFF, 0 0 2px #FFFFFF, 0 0 2px #FFFFFF"><b><i><font size="2">ATTACK TYPES</font></i></b></span><br>are designed to move quickly around the Beyblade Burst Beystadium™ and hit with power. |
||
| ⚫ | |||
| ⚫ | |||
| − | | style="width: 90%;"|<span style="color: black; text-shadow: 0 0 2px #FFFFFF, 0 0 2px #FFFFFF, 0 0 2px #FFFFFF"><b><i><font size="2">STAMINA TYPES</font></i></b></span><br> are designed to maintain their spin when left untouched. They can potentially out-spin a steady Defense Type. |
||
| ⚫ | |||
| ⚫ | |||
| − | | style="width: 90%;"|<span style="color: black; text-shadow: 0 0 2px #FFFFFF, 0 0 2px #FFFFFF, 0 0 2px #FFFFFF"><b><i><font size="2">DEFENSE TYPES</font></i></b></span><br> are designed to ward off attacks and maintain a stationary, stable position in battle. |
||
| ⚫ | |||
| − | | style="width: 10%;"|[[File:Hasbro BB type icon balance.png|50px]] |
||
| − | | style="width: 90%;"|<span style="color: black; text-shadow: 0 0 2px #FFFFFF, 0 0 2px #FFFFFF, 0 0 2px #FFFFFF"><b><i><font size="2">BALANCE TYPES</font></i></b></span><br> combine the qualities of Attack, Stamina, and Defense types, and usually incorporate design elements from all three. |
||
| − | |} |
||
| − | |||
| − | ===<b><i>Type Counters</i></b>=== |
||
| ⚫ | |||
| − | |||
| − | Traditionally, the {{Type|BB Attack HB}} counters the {{Type|BB Stamina HB}}, the {{Type|BB Stamina HB}} counters the {{Type|BB Defense HB}}, and the {{Type|BB Defense HB}} counters the {{Type|BB Attack HB}}. However, the {{Type|BB Balance HB}} differs from the other three [[Type|<b><i><span style="color: #ffe633; text-shadow: 0 0 1px #000000, 0 0 1px #000000, 0 0 1px #000000;">Types</span></i></b>]] in the regard that these Beyblade tops typically improve upon the weaknesses of the other three [[Type|<b><i><span style="color: #ffe633; text-shadow: 0 0 1px #000000, 0 0 1px #000000, 0 0 1px #000000;">Types</span></i></b>]]. [[File:Hasbro BB type icon balance.png|20px]] <font color="red"><b>Balance Types</b></font> normally possess relatively balanced [[Statistic|Stats]], including in the areas of [[Statistic#Agility|Agility]] and [[Statistic#Weight|Weight]], making this [[Type|<b><i><span style="color: #ffe633; text-shadow: 0 0 1px #000000, 0 0 1px #000000, 0 0 1px #000000;">Type</span></i></b>]] adept at most situations, especially in the hands of expert [[Blader]]s. |
||
===<b><i>How To Win</i></b>=== |
===<b><i>How To Win</i></b>=== |
||
| − | Each player loads their BEYBLADE BURST™ top onto their BEYBLADE BURST™ launcher and pulls the ripcord over the BEYBLADE BURST Beystadium™ at the same time. The first player to get to 3 points wins! |
+ | {{Quote|[[Beyblade Burst Guide Book|Beyblade Burst™ Guide Book]]|Each player loads their BEYBLADE BURST™ top onto their BEYBLADE BURST™ launcher and pulls the ripcord over the BEYBLADE BURST Beystadium™ at the same time. The first player to get to 3 points wins!}} |
| + | Each player (also called a [[Blader]]) loads their BEYBLADE™ top onto their BEYBLADE™ launcher and pulls the ripcord (called a [[Launch]]) over the [[Beystadium]]™ at the same time. The Blader to gain 3 points wins the match. Bladers engages in "Point Matches" based upon the game's point system (shown below): |
||
{| class="table" align="center" cellspacing="2" cellpadding="1" border="0" |
{| class="table" align="center" cellspacing="2" cellpadding="1" border="0" |
||
| Line 106: | Line 82: | ||
===[[File:BB dual system logo.png|30px]] <i><b>The Dual Layer System Series</b></i>=== |
===[[File:BB dual system logo.png|30px]] <i><b>The Dual Layer System Series</b></i>=== |
||
| − | {{Quote|Details on packaging|{{FM|デュアルレイヤーシステムとは?<br>ベイのレイヤーが{{Ruby|二重|<small>にじゅう</small>}}の{{Ruby|刃|<small>は</small>}}で{{Ruby|構成|<small>こうせい</small>}}された「デュアルレイヤー」に{{Rubi|進化|<small>しんか</small>}}!|Deyuaru Reiyā Shisutemu to wa? Bei no reiyā ga nijū no ha de kōsei sa reta "Deyuaru Reiyā" ni shinka!|y}}<br><i><b>What is the DUAL LAYER SYSTEM?</b></i><br>The Bey Layer features a double blade composite, the evolved "Dual Layer"!}} |
+ | <h2 style="background-color:; border: 1px solid #aaaaaa; -moz-border-radius: 7px; -khtml-border-radius: 7px; -webkit-border-radius: 7px; border-radius: 7px; color: #000; text-align: center; font-weight:; font-size: 100%; padding: 0.2em 0.4em; margin-top: 0;">{{Quote|Details on packaging|{{FM|デュアルレイヤーシステムとは?<br>ベイのレイヤーが{{Ruby|二重|<small>にじゅう</small>}}の{{Ruby|刃|<small>は</small>}}で{{Ruby|構成|<small>こうせい</small>}}された「デュアルレイヤー」に{{Rubi|進化|<small>しんか</small>}}!|Deyuaru Reiyā Shisutemu to wa? Bei no reiyā ga nijū no ha de kōsei sa reta "Deyuaru Reiyā" ni shinka!|y}}<br><i><b>What is the DUAL LAYER SYSTEM?</b></i><br>The Bey Layer features a double blade composite, the evolved "Dual Layer"!}}</h2> |
| − | In April 2016, following the release of |
+ | In April 2016, following the initial release of the Beyblade Burst toyline, [[Tomy Company LTD.|Takara Tomy]] introduced the next entry into the ''BEYBLADE BURST™'' product line. This being the [[File:BB dual system logo.png|20px]] {{Translation|"<i><b>Dual Layer System</b></i>"|{{FM|デュアルレイヤーシステム|Deyuaru Reiyā Shisutemu|y}}}}. Beyblade Burst tops in this series feature [[Energy Layer|Layers]] with a revised, composite design, using a two-tier, gestalt structure comprising a <i>Layer Core</i> and <i>Over Layer</i>. The <i>Layer Core</i> is the central component of the [[Energy Layer|Dual Layer]] that acts as a base for the ''Over Layer'', and usually facilitates major combat functions. This component also features the effigy of the Beyblade's [[Avatar|<b><span style="color: #ff35da; text-shadow: 0 0 1px #000000, 0 0 1px #000000, 0 0 1px #000000;">Avatar</span></b>]]. Conversely, the ''Over Layer'' is the clear-material component(s) of the [[Energy Layer|Dual Layer]] that covers the Layer Core and assists in shock absorption during collisions. This component also features the initials of the <i>[[Energy Layer|Dual Layer]]</i> (engraved in its center). Most Over Layers are designed for added shock absorption and to complement the Layer Core. |
| − | The term {{Translation|"'''Triple Layer'''"|{{FM|トリプルレイヤー|toripuru reiyā}}}} is used to describe any Dual Layer Beyblades with a three-tier structure. This applies almost exclusively to |
+ | The term {{Translation|"'''Triple Layer'''"|{{FM|トリプルレイヤー|toripuru reiyā}}}} is used to describe any Dual Layer Beyblades with a three-tier structure. This applies almost exclusively to |
| + | [[Xeno Xcalibur Magnum Impact|<span style="color: #ffe633; text-shadow: 0 0 2px #333333, 0 0 2px #333333, 0 0 2px #333333;"><b>B-48 Starter Xeno Xcalibur.M.I</b></span>]] and [[Lost Longinus Nine Spiral|<span style="color: #ffe633; text-shadow: 0 0 2px #333333, 0 0 2px #333333, 0 0 2px #333333;"><b>B-66 Starter Lost Longinus.N.Sp</b></span>]]. The hallmark feature of this design is the inclusion of an additional layer part(s) atop the OverLayer. Both Beyblades have features unique from each other, with Xeno Xcalibur possessing an extended, sword-shaped {{Translation|"'''Sword Layer'''"|{{FM|ソードレイヤー|sōdo reiyā}}}} and Lost Longinus possessing {{Translation|"'''Metal Dragon Layer Parts'''"|{{FM|{{Rubi|鋼鉄|<small>メタル</small>}}の{{Rubi|龍|<small>ドラゴン</small>}}レイヤーパーツ|metaru doragon reiyā pātsu}}}}. |
||
===[[File:BB god system logo.png|30px]] <i><b>Evolution Beys: The God Layer System & SwitchStrike™ Tech</b></i>=== |
===[[File:BB god system logo.png|30px]] <i><b>Evolution Beys: The God Layer System & SwitchStrike™ Tech</b></i>=== |
||
| Line 117: | Line 94: | ||
Hasbro would release these Beys under the [[File:Hasbro BB SwitchStrike Icon.png|15px]] <i><b>BEYBLADE BURST™ SWITCHSTRIKE™</b></i> brand. |
Hasbro would release these Beys under the [[File:Hasbro BB SwitchStrike Icon.png|15px]] <i><b>BEYBLADE BURST™ SWITCHSTRIKE™</b></i> brand. |
||
| − | Switchstrike Beyblades are the second-generation of Beyblade Burst tops released by [[Hasbro]]. These battling tops featured specialized Energy Layers equipped with |
+ | Switchstrike Beyblades are the second-generation of Beyblade Burst tops released by [[Hasbro]]. These battling tops featured specialized Energy Layers equipped with <b><span style="color: #ff944d; text-shadow: 0 0 1px #000000, 0 0 1px #000000, 0 0 1px #000000;">Switchstrike Tech</span></b> (Japanese: {{FM|{{Rubi|神能力|<small>ゴッドアビリティ</small>}}|Goddo Abiriti|y}} 「God Ability」)<ref>The term "Evolution Ability" is used and printed on product packaging for Funskool products.</ref> unique battle actions. This series of Beyblades were originally released by [[Tomy Company LTD.|Takara Tomy]] in Japan under their {{Translation|[[File:BB god system logo.png|20px]] '''God Layer System'''|Japanese: {{FM|{{Rubi|神|<small>ゴッド</small>}}レイヤーシステム|Goddo Reiyā Shisutemu|y}}}} series, which launched their third-generation of Beyblade Burst tops on March 18, 2017 starting with the [[File:BB god system logo.png|16px]] [[God Valkyrie 6Vortex Reboot|<span style="color: #ffe633; text-shadow: 0 0 1px #000000, 0 0 1px #000000, 0 0 1px #000000;"><b>B-73 Starter God Valkyrie.6V.Rb</b></span>]]. These battle features have varying degrees of activation, ranging from immediate to rare. |
| − | Along with ''God Layers'', this system also introduced a new customization option in the form of two-part, customizable |
+ | Along with ''God Layers'', this system also introduced a new customization option in the form of two-part, customizable ''Discs''. These upgraded Discs consisted of two (2) components: a {{Translation|"Core Disc"|Japanese: {{FM|コアディスク|koa disuku|y}}}} and a {{Translation|"Frame"|Japanese: {{FM|フレーム|furēmu|y}}}}. The ''Core Disc'' is the metal component of this new type of ''Disc'' and come in a variety of weights, designs, and shapes, similar to standard Discs. While this part can be used seperately, when assembled with a ''Frame'', ''Core Discs'' gain an added dimension of interaction that is normally unavailable to them, and drastically alters how the Beyblade top behaves in battle. Discs with this design feature were given the {{Translation|'''Frame Compatibility'''|Japanese: {{FM|フレーム{{Rubi|対応|<small>たいおう</small>}}|furēmu taiō|y}}}} label (denoted by the small, blue box beside the image of the Disc description at the rear of the product package) and are compatible with other Discs. |
Incidentally, this very innovation was first introduced with the [[Hard Metal System|Heavy Metal System]] series of First Generation Beyblades, featuring similar two-part, ''[[Hard Metal System#Customize Weight Disks|Customized Weight Disks]]''. |
Incidentally, this very innovation was first introduced with the [[Hard Metal System|Heavy Metal System]] series of First Generation Beyblades, featuring similar two-part, ''[[Hard Metal System#Customize Weight Disks|Customized Weight Disks]]''. |
||
| Line 125: | Line 102: | ||
Incorporated with every ''God Layer'' is a removable, circular token called a {{Translation|'''God Chip'''|Japanese: {{FM|ゴッドチップ|Goddo Chippu|y}}}}. While particularly inessential, ''God Chips'' provide aesthetics to the Beyblade, but offers no practical value. Takara Tomy produced a variety of ''God Chip'' called {{Translation|'''Metal God Chip'''|Japanese: {{FM|メタルゴッドチップ|Metaru Goddo Chippu|y}}}}. These variants were more useful in competitive play simply because of their increased weight. |
Incorporated with every ''God Layer'' is a removable, circular token called a {{Translation|'''God Chip'''|Japanese: {{FM|ゴッドチップ|Goddo Chippu|y}}}}. While particularly inessential, ''God Chips'' provide aesthetics to the Beyblade, but offers no practical value. Takara Tomy produced a variety of ''God Chip'' called {{Translation|'''Metal God Chip'''|Japanese: {{FM|メタルゴッドチップ|Metaru Goddo Chippu|y}}}}. These variants were more useful in competitive play simply because of their increased weight. |
||
| − | The [[Mugen Beystadium DX Set]] included a special ''Metal God Chip'' |
+ | The [[Mugen Beystadium DX Set]] included a special ''Metal God Chip'' specifically designed for the [[Energy Layer - God Valkyrie|<b><span style="color: #ffe633; text-shadow: 0 0 1px #000000, 0 0 1px #000000, 0 0 1px #000000;">God Valkyrie</span></b>]] [[Energy Layer|<span style="color: #ffe633; text-shadow: 0 0 1px #000000, 0 0 1px #000000, 0 0 1px #000000;">Energy Layer</span>]] called the {{Translation|'''Strike God Chip'''|{{FM|{{Rubi|撃|<small>トライクス</small>}}ゴッドチップ|Sutoraiku Goddo Chippu}}}}. When properly applied, ''God Valkyrie's'' "Spring Blade" ''God Ability'' is disabled, but enables a "barrage attack" capability. |
| + | |||
| + | When Hasbro began distributing Beyblade Burst products internationally, much of the naming structure would be changed, possibly to create a distinction between themselves and the Takara Tomy Beyblade Burst brand. This includes the renaming of the customizable Discs as "''Two-Part Forge Disc''" and the "Frame" as "''Rings''"<ref>{{cite web|url=https://shop.hasbro.com/en-au/product/beyblade-burst-evolution-ultimate-tournament-collection-tops-and-beystadium:470E82D9-02A7-4432-8195-54E3ACF82031|title=Beyblade Burst Evolution Ultimate Tournament Collection (Hasbro Product Page)}}. Details found in product description.</ref> and the continued use of their component code system. |
||
With this system, the combo naming system for the two-part Forge Disc followed a simple format, using the full number of the Core Disc followed by the first letter of the ''Frame'' (e.g. "<u>5</u>" Disc with <u>G</u>laive = 5G). Changes to the abbreviation system also extend to Switchstrike Energy Layers. as the first letter of the first word is lowercase, while the first letter of the second word is uppercase (e.g. God Valkyrie = gV). |
With this system, the combo naming system for the two-part Forge Disc followed a simple format, using the full number of the Core Disc followed by the first letter of the ''Frame'' (e.g. "<u>5</u>" Disc with <u>G</u>laive = 5G). Changes to the abbreviation system also extend to Switchstrike Energy Layers. as the first letter of the first word is lowercase, while the first letter of the second word is uppercase (e.g. God Valkyrie = gV). |
||
===[[File:BB choz system logo.png|30px]] <i><b>Turbo Beys: The Cho-Z Layer System & SlingShock™ Tech</b></i>=== |
===[[File:BB choz system logo.png|30px]] <i><b>Turbo Beys: The Cho-Z Layer System & SlingShock™ Tech</b></i>=== |
||
| − | {{Quote|Details on packaging|{{FM|{{Rubi|超Ƶ|<small>チョウゼツ</small>}}レイヤーシステムとは?<br>ベイのレイヤーが{{Rubi|超Ƶ|<small>チョウゼツ</small>}}アビリティ亜鉛合金 |
+ | {{Quote|Details on packaging|{{FM|{{Rubi|超Ƶ|<small>チョウゼツ</small>}}レイヤーシステムとは?<br>ベイのレイヤーが{{Rubi|超Ƶ|<small>チョウゼツ</small>}}アビリティ({{Ruby|亜鉛|<small>あえん</small>}}{{Ruby|合金|<small>ごうきん</small>}} [Zinc-Alloy] パーツを{{Ruby|使|<small>つか</small>}}っ{{Ruby|能力|<small>のうりょく</small>}}) を{{Rubi|搭|<small>とう</small>}}{{Rubi|載|<small>さい</small>}}した「{{Rubi|超Ƶ|<small>チョウゼツ</small>}}レイヤー」に{{Rubi|進化|<small>しんか</small>}}!|Chō Z Reiyā Shisutemu to wa? Bei no reiyā ga Chō-Zetsu Abiriti (Aen Gōkin [Zinc-Alloy] pātsu o tsukanōryoku) o tōsai shita "Chō-Zetsu Reiyā" ni shinka!|y}}<br><i><b>What is the CHO-Z LAYER SYSTEM?</b></i><br>The Bey Layer features a "Cho-Z Ability" powered by Zinc-Alloy parts, the evolved "Cho-Z Layer"!}} |
| − | The fourth series of Beyblade Burst tops released by [[Tomy Company LTD.|Takara Tomy]] in March 2018, introduced the |
+ | The fourth series of Beyblade Burst tops released by [[Tomy Company LTD.|Takara Tomy]] in March 2018, introduced the "'''Cho-Z Layer System'''" (Japanese: {{FM|{{Rubi|超Ƶ|<small>チョウゼツ</small>}}レイヤーシステム|Chōzetsu Reiyā Shisutemu|y}}), starting with the [[File:BB choz system logo.png|16px]] [[Winning Valkyrie 12 Volcanic|<span style="color: #ffe633; text-shadow: 0 0 2px #333333, 0 0 2px #333333, 0 0 2px #333333;"><b>B-104 Starter Winning Valkyrie.12.Vl</b></span>]]. These Beyblades feature Energy Layers reinforced with zinc-alloy metal parts, resulting in more intense, high-impact battles. These ''Energy Layers'' also feature their own signature gimmicks and properties called a "<b><span style="color: #ff944d; text-shadow: 0 0 1px #000000, 0 0 1px #000000, 0 0 1px #000000;">Cho-Z Ability</span></b>" (Japanese: {{FM|{{Rubi|超Ƶ|<small>チョウゼツ</small>}}アビリティ|Chōzetsu Abiriti|y}}). (e.g. Winning Valkyrie's {{Translation|"'''Metal Slash'''"|{{FM|メタルスラッシュ|Metaru Surasshu}}}}.) |
This series also continues the use of customizable ''Core Discs'' and ''Frames'' that were first introduced with the ''God Layer System''. New Core Discs and Frames were produced that are also backward-compatible with previous ''Core Discs'' and ''Frames''. |
This series also continues the use of customizable ''Core Discs'' and ''Frames'' that were first introduced with the ''God Layer System''. New Core Discs and Frames were produced that are also backward-compatible with previous ''Core Discs'' and ''Frames''. |
||
| Line 138: | Line 117: | ||
Similar to the God Chips of the God Layer System, Cho-Z Layers have a unique customization option. Using hoop-shaped accessories called {{Translation|"'''[[Level Chips]]'''"|{{FM|レベルチップ|Reberu Chippu|y}}}}, that fit beneath the 'face' of a Cho-Z Layer, players can improve various facilities of the Layer such as stability, locking mechanism, even weight when equipped. [[Level Chips]] also plays a special role in official [[wbba.]] competitions and are usually exclusively obtainable at official [[wbba.]] events. Though, they can be acquired through alternative means (i.e. CoroCoro promotional). |
Similar to the God Chips of the God Layer System, Cho-Z Layers have a unique customization option. Using hoop-shaped accessories called {{Translation|"'''[[Level Chips]]'''"|{{FM|レベルチップ|Reberu Chippu|y}}}}, that fit beneath the 'face' of a Cho-Z Layer, players can improve various facilities of the Layer such as stability, locking mechanism, even weight when equipped. [[Level Chips]] also plays a special role in official [[wbba.]] competitions and are usually exclusively obtainable at official [[wbba.]] events. Though, they can be acquired through alternative means (i.e. CoroCoro promotional). |
||
| − | In mid November 2018, [[Tomy Company LTD.|Takara Tomy]] released the |
+ | In mid November 2018, [[Tomy Company LTD.|Takara Tomy]] released the [[File:BB choz system logo.png|16px]] [[Cho-Z Valkyrie Zenith Evolution|<span style="color: #ffe633; text-shadow: 0 0 2px #333333, 0 0 2px #333333, 0 0 2px #333333;"><b>B-127 Starter CHO-Z VALKYRIE.Z.Ev</b></span>]], the first of three Beyblade tops featuring the revolutionary, new <b><span style="color: #ff944d; text-shadow: 0 0 1px #000000, 0 0 1px #000000, 0 0 1px #000000;">Cho-Z Ability</span></b>: <b><span style="color: #ff944d; text-shadow: 0 0 1px #000000, 0 0 1px #000000, 0 0 1px #000000;">Cho-Z Kakusei</span></b> (Japanese: {{FM|{{Rubi|超Ƶ|<small>チョウゼツ</small>}}覚醒|chō-zetsu kakusei|y}}). [[Energy Layer|Cho-Z Layers]] with this feature are built with [[Energy Layer|<b><span style="color: #ffe633; text-shadow: 0 0 1px #000000, 0 0 1px #000000, 0 0 1px #000000;">Turbo Blades</span></b>]] (Japanese: {{FM|{{Rubi|超Ƶ|<small>チョウゼツ</small>}}ウイング|chō-zetsu uingu|y}}, <i>Chō-Zetsu Wing</i>) pop-out action that engages with high-powered '''[[Launch]]es'''. When launched with appropriate strength, these Turbo Blades will deploy, switching from their basic {{Translation|'''Normal Mode'''|{{FM|{{Rubi|通常|<small>つうじょう</small>}}モード|tsūjō mōdo|y}}}} to a high-performance {{Translation|'''Invincible Mode'''|{{FM|{{Rubi|無敵|<small>むてき</small>}}モード|muteki mōdo|y}}}}. This drastically improves their overall capabilities, while also deploying {{Translation|'''Burst Stoppers'''|{{FM|バーストストッパー|bāsuto sutoppā|y}}}} into the Layer's slots, thus preventing the "Burst" feature from activating. |
[[Tomy Company LTD.|Takara Tomy]]'s '''''Beyblade Burst Cho-Z''''' brand referred to this action as the Bey switching from their basic {{Translation|'''Normal Mode'''|Japanese: {{FM|{{Rubi|通常|<small>つうじょう</small>}}モード|tsūjō mōdo|y}}}} to a high-performance {{Translation|'''Invincible Mode'''|Japanese: {{FM|{{Rubi|無敵|<small>むてき</small>}}モード|muteki mōdo|y}}}} while [[Hasbro]]'s '''''Beyblade Burst Turbo''''' brand referred to this action as the '''Power Launch Attack'''. |
[[Tomy Company LTD.|Takara Tomy]]'s '''''Beyblade Burst Cho-Z''''' brand referred to this action as the Bey switching from their basic {{Translation|'''Normal Mode'''|Japanese: {{FM|{{Rubi|通常|<small>つうじょう</small>}}モード|tsūjō mōdo|y}}}} to a high-performance {{Translation|'''Invincible Mode'''|Japanese: {{FM|{{Rubi|無敵|<small>むてき</small>}}モード|muteki mōdo|y}}}} while [[Hasbro]]'s '''''Beyblade Burst Turbo''''' brand referred to this action as the '''Power Launch Attack'''. |
||
| − | + | In an attempt to differentiate it's products from it's Takara-Tomy counterpart, Hasbro released their [[File:Hasbro BB SlingShock Icon.png|15px]] SlingShock product line. Beyblade tops in this toyline featured parts that carried many of the same, basic design elements found with Beyblade tops in [[Tomy Company LTD.|Takara Tomy]]'s Cho-Z Layer System product line. However, Hasbro, as a development strategy, would make several changes to substitute the zinc-alloy material (the hallmark of Takara-Tomy's Cho-Z Layers) for plastic in the manufacture of their Energy Layers. This series marked the shift in marketing and development of their brand to the development of more Beystadium and [[Performance Tip (Beyblade Burst)|Performance Tip]]-oriented products with the main feature of this series being mode-changing [[Performance Tip (Beyblade Burst)|Performance Tips]] that were designed to be compatible with specialized Beystadiums. |
|
===[[File:BB system logo gt layer.png|30px]]<i><b>Gamma Beys: The Gatinko Layer System & HyperSphere™ Tech</b></i>=== |
===[[File:BB system logo gt layer.png|30px]]<i><b>Gamma Beys: The Gatinko Layer System & HyperSphere™ Tech</b></i>=== |
||
{{Quote|Details on packaging|{{FM|{{Rubi|GT|<small>ガチンコ</small>}}レイヤーシステムとは?<br>パーツ組み替えで改造ができる!!ベイのレイヤーが3種類のパーツを組み替えて自由にカスタマイズできる「{{Rubi|GT|<small>ガチンコ</small>}}レイヤー」に進化!|Gachinko Reiyā Shisutemu to wa? Pātsu kumikae de kaizō ga dekiru! ! Bei no reiyā ga 3 shurui no pātsu o kumikaete jiyū ni kasutamaizu dekiru "Gachinko Reiyā" ni shinka!|y}}<br><i><b>What is the GaTinko LAYER SYSTEM?</b></i><br>Parts can be freely rearranged for added customization!! The Bey's Layer can be freely customized by rearranging three types of parts, the evolved “GaTinko Layer”!}} |
{{Quote|Details on packaging|{{FM|{{Rubi|GT|<small>ガチンコ</small>}}レイヤーシステムとは?<br>パーツ組み替えで改造ができる!!ベイのレイヤーが3種類のパーツを組み替えて自由にカスタマイズできる「{{Rubi|GT|<small>ガチンコ</small>}}レイヤー」に進化!|Gachinko Reiyā Shisutemu to wa? Pātsu kumikae de kaizō ga dekiru! ! Bei no reiyā ga 3 shurui no pātsu o kumikaete jiyū ni kasutamaizu dekiru "Gachinko Reiyā" ni shinka!|y}}<br><i><b>What is the GaTinko LAYER SYSTEM?</b></i><br>Parts can be freely rearranged for added customization!! The Bey's Layer can be freely customized by rearranging three types of parts, the evolved “GaTinko Layer”!}} |
||
| − | Japan's fourth series of Beyblade Burst tops were released in March 2019, starting with [[Ace Dragon Sting Charge Zan|B-133 Ace Dragon.St.Ch Zan DX Starter pack]], introducing the {{translation|"''Gatinko Layer System''"|Japanese: {{FM|ガチンコレイヤーシステム|Gachinko Reiyā Shisutemu|y}}|stylized as <b>GaTinko LAYER SYSTEM</b>}}. In place of a single layer, the Gatinko Layer System is comprised of three parts: the {{translation|'''Gatinko Chip'''|Japanese: ガチンコチップ|Gachinko Chippu}}, the {{translation|'''Weight'''|Japanese: ウエイト|Ueito}}, and the {{translation|'''Base'''|Japanese: ベース|Bēsu}}. |
+ | Japan's fourth series of Beyblade Burst tops were released in March 2019, starting with [[File:BB system logo gt layer.png|24px]] [[Ace Dragon Sting Charge Zan|<span style="color: #ffe633; text-shadow: 0 0 2px #333333, 0 0 2px #333333, 0 0 2px #333333;"><b>B-133 Ace Dragon.St.Ch Zan DX Starter pack</b></span>]], introducing the {{translation|"''Gatinko Layer System''"|Japanese: {{FM|ガチンコレイヤーシステム|Gachinko Reiyā Shisutemu|y}}|stylized as <b>GaTinko LAYER SYSTEM</b>}}. In place of a single layer, the Gatinko Layer System is comprised of three parts: the {{translation|'''Gatinko Chip'''|Japanese: ガチンコチップ|Gachinko Chippu}}, the {{translation|'''Weight'''|Japanese: ウエイト|Ueito}}, and the {{translation|'''Base'''|Japanese: ベース|Bēsu}}. |
In mid-October 2019, Takara Tomy released a new type of Energy Layer Beyblades with [[Prime Apocalypse 0Dagger Ultimate Reboot'|<span style="color: #ffe633; text-shadow: 0 0 2px #333333, 0 0 2px #333333, 0 0 2px #333333;"><b>PRIME αPOCALYPSE.0D.Ul']]</b></span> and [[Regalia Genesis Hybrid|<span style="color: #ffe633; text-shadow: 0 0 2px #333333, 0 0 2px #333333, 0 0 2px #333333;"><b>REGALIA γENESIS.Hy]]</b></span>, with the <b><span style="color: #ff944d; text-shadow: 0 0 1px #000000, 0 0 1px #000000, 0 0 1px #000000;">Mugen Lock</span></b> (Japanese: {{FM|{{Rubi|無|<small>む</small>}}{{Rubi|限|<small>げん</small>}}ロック|Mugen Rokku|y}}) feature. These Beys feature [[Energy Layer|<b><span style="color: #ffe633; text-shadow: 0 0 1px #000000, 0 0 1px #000000, 0 0 1px #000000;">Layers</span></b>]] built without the "<b><span style="color: #ff944d; text-shadow: 0 0 1px #000000, 0 0 1px #000000, 0 0 1px #000000;">Burst</span></b>" feature which prevent the Beyblades from <b><span style="color: #ff944d; text-shadow: 0 0 1px #000000, 0 0 1px #000000, 0 0 1px #000000;">Bursting</span></b>. |
In mid-October 2019, Takara Tomy released a new type of Energy Layer Beyblades with [[Prime Apocalypse 0Dagger Ultimate Reboot'|<span style="color: #ffe633; text-shadow: 0 0 2px #333333, 0 0 2px #333333, 0 0 2px #333333;"><b>PRIME αPOCALYPSE.0D.Ul']]</b></span> and [[Regalia Genesis Hybrid|<span style="color: #ffe633; text-shadow: 0 0 2px #333333, 0 0 2px #333333, 0 0 2px #333333;"><b>REGALIA γENESIS.Hy]]</b></span>, with the <b><span style="color: #ff944d; text-shadow: 0 0 1px #000000, 0 0 1px #000000, 0 0 1px #000000;">Mugen Lock</span></b> (Japanese: {{FM|{{Rubi|無|<small>む</small>}}{{Rubi|限|<small>げん</small>}}ロック|Mugen Rokku|y}}) feature. These Beys feature [[Energy Layer|<b><span style="color: #ffe633; text-shadow: 0 0 1px #000000, 0 0 1px #000000, 0 0 1px #000000;">Layers</span></b>]] built without the "<b><span style="color: #ff944d; text-shadow: 0 0 1px #000000, 0 0 1px #000000, 0 0 1px #000000;">Burst</span></b>" feature which prevent the Beyblades from <b><span style="color: #ff944d; text-shadow: 0 0 1px #000000, 0 0 1px #000000, 0 0 1px #000000;">Bursting</span></b>. |
||
| ⚫ | |||
| ⚫ | |||
| + | |||
| ⚫ | |||
GT Ability: <b><span style="color: #ff944d; text-shadow: 0 0 1px #000000, 0 0 1px #000000, 0 0 1px #000000;">Armed Mugen Lock</span></b> (Japanese: {{FM|アーマード{{Rubi|無|<small>む</small>}}{{Rubi|限|<small>げん</small>}}ロック|Āmādo Mugen Rokku|y}}): The BigBang Armor acts as Counter Blades (Japanese: {{FM|カウンター{{Rubi|刃|<small>は</small>}}|Kauntā Ha|y}}) |
GT Ability: <b><span style="color: #ff944d; text-shadow: 0 0 1px #000000, 0 0 1px #000000, 0 0 1px #000000;">Armed Mugen Lock</span></b> (Japanese: {{FM|アーマード{{Rubi|無|<small>む</small>}}{{Rubi|限|<small>げん</small>}}ロック|Āmādo Mugen Rokku|y}}): The BigBang Armor acts as Counter Blades (Japanese: {{FM|カウンター{{Rubi|刃|<small>は</small>}}|Kauntā Ha|y}}) |
||
| Line 157: | Line 138: | ||
Get the drop on your opponents with Hypersphere tech! Battle in a Hypersphere Beystadium and drop into battle for more epic burst moments. Beyblade Burst Rise™ Hypersphere™ tops come with a removable <i>GT Chip</i> in the [[Energy Layer]]. Interchangeable with other right-spin GT Chip-compatible tops. |
Get the drop on your opponents with Hypersphere tech! Battle in a Hypersphere Beystadium and drop into battle for more epic burst moments. Beyblade Burst Rise™ Hypersphere™ tops come with a removable <i>GT Chip</i> in the [[Energy Layer]]. Interchangeable with other right-spin GT Chip-compatible tops. |
||
| + | ===<i><b>SuperKing Beys: The SuperKing Layer System!!</b></i>=== |
||
| ⚫ | |||
| + | <h2 style="background-color:; border: 1px solid #aaaaaa; -moz-border-radius: 7px; -khtml-border-radius: 7px; -webkit-border-radius: 7px; border-radius: 7px; color: #000; text-align: left; font-weight:; font-size: 100%; padding: 0.2em 0.4em; margin-top: 0;">{{Quote|Details on packaging|{{FM|{{Rubi|超王|<small>スパーキング</small>}}レイヤーシステムとは?<br>{{Rubi|超王|<small>スパーキング</small>}}レイヤーはメタルパツ『シャーシ』を{{Rubi|若|<small>とう</small>}}{{Rubi|載|<small>さい</small>}}し、{{Rubi|低|<small>てい</small>}}{{Rubi|重|<small>しん</small>}}{{Rubi|心|<small>しん</small>}}&{{Rubi|高|<small>こう</small>}}{{Rubi|剛|<small>ごう</small>}}{{Rubi|性|<small>せい</small>}}に{{Rubi|進|<small>しん</small>}}{{Rubi|化|<small>か</small>}}したことで{{Rubi|攻|<small>こう</small>}}{{Rubi|撃|<small>げき</small>}}{{Rubi|力|<small>りょく</small>}}と{{Rubi|回|<small>かい</small>}}{{Rubi|転|<small>てん</small>}}{{Rubi|力|<small>りょく</small>}}が{{Rubi|飛|<small>ひ</small>}}{{Rubi|躍|<small>やく</small>}}{{Rubi|的|<small>てき</small>}}にアップ!|Supākingu Reiyā Shisutemu to wa? Supākingu Reiyā wa metaru patsu “shāshi” o waka noshi, tei jūshin & kō gōsei ni shinka shita koto de kōgeki-ryoku to kaiten-ryoku ga hiyaku-teki ni appu!|y}}<br><i><b>What is the Super King Layer System?</b></i><br>Superking Layers feature metal parts called the "Chassis" which enhances their center of mass and weight, dramatically improving their [[Statistic#Attack|attack]] and [[Statistic#Rotation|rotation]] power!}}</h2> |
||
| + | The <b>SuperKing Layer System</b> (Japanese: <b>{{FM|{{Rubi|超王|<small>スパーキング</small>}}レイヤーシステム|Supākingu Reiyā Shisutemu|y}}</b>) is the fifth product line in the Beyblade Burst™ franchise produced by TakaraTomy and introduces new Beyblade Burst™ tops with [[Energy Layer|<span style="color: #ffe633; text-shadow: 0 0 1px #000000, 0 0 1px #000000, 0 0 1px #000000;">customizable Energy Layers</span>]]. Similar to Energy Layers found with Gatinko Beys, Bladers can customize the Energy Layers of their SuperKing Beys using parts within this system. However, SuperKing Beys use a different parts system than what was used in the previous series, consisting of the following parts: |
||
| ⚫ | |||
| ⚫ | |||
| + | | style="width: 80%;"|[[Energy Layer#SuperKing Layers|<b><i><span style="color: #ffe633; text-shadow: 0 0 2px #333333, 0 0 2px #333333, 0 0 2px #333333;">SUPERKING CHIP</span></i></b>]]<br><h2 style="background-color:; border: 1px solid #aaaaaa; -moz-border-radius: 7px; -khtml-border-radius: 7px; -webkit-border-radius: 7px; border-radius: 7px; color: #000; text-align: left; font-weight:; font-size: 100%; padding: 0.2em 0.4em; margin-top: 0;"> |
||
| + | {{{text|Locks all components of the <span style="color: #ffe633; text-shadow: 0 0 1px #000000, 0 0 1px #000000, 0 0 1px #000000;">SuperKing Layer</span> together. Contains a <b>Chip Core</b> (Japanese: <b>{{FM|チップコア|Chippu Koa|y}}</b>), which comes in regular and metal core varieties. <!---(Japanese: <b>{{FM|スパーキングチップ|Supākingu Chippu|y}}</b>)--->}}} |
||
| + | </h2> |
||
| ⚫ | |||
| ⚫ | |||
| + | | style="width: 80%;"|[[Energy Layer#SuperKing Layers|<b><i><span style="color: #ffe633; text-shadow: 0 0 2px #333333, 0 0 2px #333333, 0 0 2px #333333;">RING</span></i></b>]]<br><h2 style="background-color:; border: 1px solid #aaaaaa; -moz-border-radius: 7px; -khtml-border-radius: 7px; -webkit-border-radius: 7px; border-radius: 7px; color: #000; text-align: left; font-weight:; font-size: 100%; padding: 0.2em 0.4em; margin-top: 0;"> |
||
| + | {{{text|Provides the weaponry and determines the battle style of the <span style="color: #ffe633; text-shadow: 0 0 1px #000000, 0 0 1px #000000, 0 0 1px #000000;">SuperKing Layer</span>. <!---(Japanese: <b>{{FM|リング|Ringu|y}}</b>)--->}}} |
||
| + | </h2> |
||
| ⚫ | |||
| ⚫ | |||
| + | | style="width: 80%;"|[[Energy Layer#SuperKing Layers|<b><i><span style="color: #ffe633; text-shadow: 0 0 2px #333333, 0 0 2px #333333, 0 0 2px #333333;">CHASSIS</span></i></b>]]<br><h2 style="background-color:; border: 1px solid #aaaaaa; -moz-border-radius: 7px; -khtml-border-radius: 7px; -webkit-border-radius: 7px; border-radius: 7px; color: #000; text-align: left; font-weight:; font-size: 100%; padding: 0.2em 0.4em; margin-top: 0;"> |
||
| + | {{{text|Provides the base upon which the other SuperKing Layer components assemble upon. The Chassis also determines [[Spin|<span style="color: #ff944d; text-shadow: 0 0 1px #000000, 0 0 1px #000000, 0 0 1px #000000;">Spin Direction</span>]] and controls the weight and center-of-gravity of the <span style="color: #ffe633; text-shadow: 0 0 1px #000000, 0 0 1px #000000, 0 0 1px #000000;">SuperKing Layer</span>. <!---(Japanese: <b>{{FM|シャーシ|Shāshi|y}}</b>)--->}}} |
||
| + | </h2> |
||
| ⚫ | |||
| + | SuperKing Layers appear to be really simple to customize and offer a level of modification that no other kind of Energy Layer can match! |
||
| + | |||
| + | SuperKing Beys will make their first, official release with the [[Super Hyperion Xceed 1A|<span style="color: #ffffff; text-shadow: 0 0 2px #981b00, 0 0 2px #981b00, 0 0 2px #981b00;"><b>B-159 Booster Super Hyperion.Xc 1A</b></span>]]. |
||
| + | |||
| + | News of this new (and presumably final) product line was teased in late February of 2020 by Japanese media sources. Similar to the GT Layer System, this latest parts system features a new [[Energy Layer|<span style="color: #ffe633; text-shadow: 0 0 1px #000000, 0 0 1px #000000, 0 0 1px #000000;">Customizable Energy Layers</span>]] with a revised customization mechanic than the previous Beyblade Burst parts system. |
||
| + | |||
| + | The SuperKing Layer System also continues the trend of named special features for their Beys, in this series called a "<b><span style="color: #ff944d; text-shadow: 0 0 1px #000000, 0 0 1px #000000, 0 0 1px #000000;">SuperKing Ability</span></b>" (Japanese: {{FM|{{Rubi|超王|<small>スパーキング</small>}}アビリティ|Supākingu Abiriti|y}}). |
||
| + | |||
| ⚫ | |||
| + | |||
| + | The ''<b><span style="color: #ff944d; text-shadow: 0 0 1px #000000, 0 0 1px #000000, 0 0 1px #000000;">Turbo Valtryek Whip</span></b>'' deals immediate Burst Damage to the enemy Bey using a fast and heavy [[Attack (action)|attack]] from the blades of the [[Energy Layer - Cho-Z Valkyrie|Turbo Valtryek V3]] [[Energy Layer]]. When ''Turbo Valtryek'' enters its [[Turbo Awakening]] state, [[Resonance]]-based energy blades ignite from the Turbo Blades and deals massive Stability and Burst Damage to the enemy Bey. |
||
| + | |||
| + | {{FM|ブレイブヴァルキリー.{{Rubi|Ev'|<small>ィーブイダッシュ</small>}}{{Rubi|2A|<small>ツーエー</small>}}|Bureibu Varukirī Ībui Dasshu Tsū Ē|y}} |
||
| + | |||
| + | PARTS<br> |
||
| + | ~ヴァルキリー~<br> |
||
| + | {{Rubi|戦|<small>たたか</small>}}いの{{Rubi|神|<small>かみ</small>}}ヴァルキリーモチーフ。ベイブレード{{Rubi|全体|<small>ぜんたい</small>}}をロックする{{Rubi|右|<small>みを</small>}}{{Rubi|回転|<small>かいてん</small>}}のスパーキングチップ。 |
||
| + | |||
| + | ~ブレイブ~<br> |
||
| + | {{Rubi|大|<small>おお</small>}}{{Rubi|型|<small>かた</small>}}ラバー{{Rubi|刃|<small>ば</small>}}の{{Rubi|摩擦力|<small>まさつりょく</small>}}で{{Rubi|相手|<small>あいて</small>}}をとらえ、ラバーの{{Rubi|弾力|<small>だんりよく</small>}}でバウンド{{Rubi|攻撃|<small>こうげき</small>}}を{{Rubi|仕|<small>し</small>}}{{Rubi|掛|<small>か</small>}}けるアタックタイプの{{Rubi|右|<small>みを</small>}}{{Rubi|回転|<small>かいてん</small>}}リング。 |
||
| + | |||
| + | ~2A (ツーエー)~<br> |
||
| + | {{Rubi|大|<small>おお</small>}}きな3{{Rubi|枚|<small>まい</small>}}のラバー{{Rubi|刃|<small>ば</small>}}で{{Rubi|相手|<small>あいて</small>}}に{{Rubi|強烈|<small>きょうれつ</small>}}に{{Rubi|引|<small>ひ</small>}}っ{{Rubi|掛|<small>か</small>}}かり{{Rubi|攻撃|<small>こうげき</small>}}を{{Rubi|与|<small>あた</small>}}える{{Rubi|右|<small>みぎ</small>}}{{Rubi|回転|<small>かいてん</small>}}ダブルシャーシ。 |
||
| + | |||
| + | ~エボリューションダッシュ~<br> |
||
| + | {{Rubi|全高|<small>ぜんこう</small>}}が{{Rubi|高|<small>たか</small>}}く、{{Rubi|使|<small>っか</small>}}い{{Rubi|込|<small>こ</small>}}むことによって{{Rubi|軸|<small>じく</small>}}{{Rubi|先|<small>さき</small>}}が{{Rubi|削|<small>けず</small>}}れて{{Rubi|動|<small>うご</small>}}きが{{Rubi|変化|<small>へんか</small>}}する。{{Rubi|強化|<small>きようか</small>}}バネが{{Rubi|内蔵|<small>ないぞう</small>}}されていることで、{{Rubi|攻撃力|<small>こうげきりょく</small>}}がさらに{{Rubi|上|<small>あ</small>}}がったアタック{{Rubi|系|<small>けい</small>}}ドライバー。 |
||
| + | |||
| + | ACTION<br> |
||
| + | <h2 style="background-color:; border: 1px solid #aaaaaa; -moz-border-radius: 7px; -khtml-border-radius: 7px; -webkit-border-radius: 7px; border-radius: 7px; color: #000; text-align: center; font-weight:; font-size: 100%; padding: 0.2em 0.4em; margin-top: 0;"> |
||
| + | {{Quote|Details on packaging of the B-163 Brave Valkyrie.Ev' 2A Booster pack|{{FM|<b>{{Rubi|超王|<small>スパーキング</small>}}アビリティ</b><br><i><b>ブレイブソード</b></i><br> |
||
| + | リングとシャーシの{{Rubi|高|<small>こう</small>}}{{Rubi|摩|<small>ま</small>}}{{Rubi|擦|<small>さつ</small>}}ラバー{{Rubi|刃|<small>ば</small>}}で{{Rubi|相|<small>あい</small>}}{{Rubi|手|<small>て</small>}}を{{Rubi|弾|<small>はし</small>}}き{{Rubi|飛|<small>と</small>}}ばし、{{Rubi|鋭|<small>するど</small>}}い{{Rubi|剣|<small>けん</small>}}{{Rubi|先|<small>さき</small>}}でとどめを{{Rubi|刺|<small>さ</small>}}す!|Supākingu Abiriti ~ Bureibu Sōdo ~ ringu to shāshi no kō masatsu rabā ha de aite o hiki tobashi, surudoi kensaki de todome o sasu!|y}}<br><i><b>Superking Ability: Brave Sword</b></i><br>Use the high-friction rubber blades on the ring and chassis to flip the opponent away, and stab them with a sharp sword!}}</h2> |
||
| + | |||
| + | <h2 style="background-color:; border: 1px solid #aaaaaa; -moz-border-radius: 7px; -khtml-border-radius: 7px; -webkit-border-radius: 7px; border-radius: 7px; color: #000; text-align: center; font-weight:; font-size: 100%; padding: 0.2em 0.4em; margin-top: 0;"> |
||
| + | {{Quote|Details on packaging of the B-159 Super Hyperion.Xc 1A Booster pack|{{FM|<b>{{Rubi|超王|<small>スパーキング</small>}}アビリティ: スーパーストライク</b><br>リングの{{Ruby|巨大|<small>きょだい</small>}}な2{{Ruby|枚|<small>まい</small>}}アッパー{{Ruby|刃|<small>ば</small>}}とシャーシのブ{{Ruby|厚|<small>あつ</small>}}い{{Ruby|打撃|<small>だげき</small>}}{{Ruby|刃|<small>ば</small>}}が{{Ruby|重|<small>かさ</small>}}なり{{Ruby|合|<small>あ</small>}}うことで、{{Ruby|相手|<small>あいて</small>}}を{{Ruby|超|<small>ちょう</small>}}バースト!|Supākingu Abiriti - Sūpā Sutoraiku: Ringu no kyodaina 2-mai appā ha to shāshi no bu atsui dageki ha ga kasanariau koto de, aite o chō bāsuto!|y}}<br><i><b>Superking Ability: Super Strike</b></i><br>The two, huge upper blades of the [[Energy Layer#Superking Layer|<span style="color: #ffe633; text-shadow: 0 0 1px #000000, 0 0 1px #000000, 0 0 1px #000000;">Ring</span>]] and the thick striking blade of the [[Energy Layer#Superking Layer|<span style="color: #ffe633; text-shadow: 0 0 1px #000000, 0 0 1px #000000, 0 0 1px #000000;">Chassis</span>]] overlap with each other to [[Burst System|<span style="color: #ff944d; text-shadow: 0 0 1px #000000, 0 0 1px #000000, 0 0 1px #000000;">Burst</span>]] the opponent!}}</h2> |
||
| + | In the actual product line, the <i>Super Strike</i> is labeled the <b>Superking Ability</b> of the featured Beyblade of the B-159 booster pack: Super Hyperion.Xc 1A. Referencing the information printed on the packaging, the ''Super Strike'' uses the [[Ring - Super|<span style="color: #ffe633; text-shadow: 0 0 1px #000000, 0 0 1px #000000, 0 0 1px #000000;">Super Ring</span>]], in conjunction with the [[Chassis - 1A|<span style="color: #ffe633; text-shadow: 0 0 1px #000000, 0 0 1px #000000, 0 0 1px #000000;">1A Chassis</span>]], to deal immediate Burst Damage to the enemy Bey. This is achieved by the design and architecture of the individual Ring and Chassis components which form a low-angled slope for an enhanced [[Attack (action)#Upper Attack|Upper Attack]]. |
||
| + | |||
| + | <h2 style="background-color:; border: 1px solid #aaaaaa; -moz-border-radius: 7px; -khtml-border-radius: 7px; -webkit-border-radius: 7px; border-radius: 7px; color: #000; text-align: center; font-weight:; font-size: 100%; padding: 0.2em 0.4em; margin-top: 0;"> |
||
| + | {{Quote|Details on the packaging of the B-159 Booster Super Hyperion.Xc 1A|{{FM|リング × シャーシの{{Ruby|超|<small>ちょう</small>}}{{Ruby|巨大|<small>きょだい</small>}}{{Ruby|刃|<small>ば</small>}}アタック!!|Ringu × Shāshi no chōkyodai ha atakku!!|y}}<br>[[Energy Layer#Superking Layer|<span style="color: #ffe633; text-shadow: 0 0 1px #000000, 0 0 1px #000000, 0 0 1px #000000;">Ring</span>]] x [[Energy Layer#Superking Layer|<span style="color: #ffe633; text-shadow: 0 0 1px #000000, 0 0 1px #000000, 0 0 1px #000000;">Chassis</span>]] super giant blade attack!!}}</h2> |
||
==Trivia== |
==Trivia== |
||
| + | *The actual script for the kanji "神能力" reads "''Shinnōryoku''" meaning "''Divine Ability''" |
||
| − | Each Beyblade Burst product produced by [[Tomy Company LTD.|Takara Tomy]] were manufactured using the following materials: |
+ | *Each Beyblade Burst product produced by [[Tomy Company LTD.|Takara Tomy]] were manufactured using the following materials: |
| − | *PA: Polyamide |
||
| + | <h2 style="background-color:; border: 1px solid #aaaaaa; -moz-border-radius: 7px; -khtml-border-radius: 7px; -webkit-border-radius: 7px; border-radius: 7px; color: #000; text-align: center; font-weight:; font-size: 100%; padding: 0.2em 0.4em; margin-top: 0;"> |
||
| − | *PC: Polycarbonate plastic |
||
| + | <CENTER> |
||
| − | *PMMA: Poly(methyl methacrylate) plastic |
||
| + | <TABLE width=100%> |
||
| − | *POM: Polyoxymethylene |
||
| ⚫ | |||
| − | *ABS: Acrylonitrile butadiene styrene |
||
| + | <TD>PA: Polyamide</TD><TD>PC: Polycarbonate plastic</TD><TD>PMMA: Poly(methyl methacrylate) plastic</TD> |
||
| − | *Zinc-Alloy |
||
| + | </TR> |
||
| + | <TR> |
||
| + | <TD>POM: Polyoxymethylene</TD><TD>ABS: Acrylonitrile butadiene styrene</TD><TD>Zinc-Alloy (亜鉛合金)</TD> |
||
| + | <TR> |
||
| + | <TD>PVC: Polyvinyl chloride</TD> |
||
| + | </TR> |
||
| + | </TABLE> |
||
| + | </CENTER> |
||
| + | </h2> |
||
| + | |||
==References== |
==References== |
||
{{Reflist}} |
{{Reflist}} |
||
Revision as of 16:00, 8 May 2020
The Beyblade Burst™ Performance Top System™ is the official name for the third-generation of Beyblade tops released by Hasbro. All Beyblade Burst™ tops include a dynamic “Burst” feature designed to burst into pieces during battle. Originally released in Japan on July 18th of 2015 by Takara Tomy as the ![]() Burst System™, Hasbro began worldwide distribution of Beyblade Burst™ products in September of 2016 under the name Beyblade Burst™ Performance Top System™.
Burst System™, Hasbro began worldwide distribution of Beyblade Burst™ products in September of 2016 under the name Beyblade Burst™ Performance Top System™.
What is the Beyblade Burst™ Performance Top System™?
Takara Tomy's Burst System™ and, by extension, Hasbro's Beyblade Burst™ Performance Top System™ is the archetype for Generation 3 Beyblade tops using a three-components modular system. Players (called Bladers) can select and customize the Beys similar to previous Beyblade generations and systems using three components to engage in -one-on-one combat, and can choose to switch between them between "Battles". The system features the innovative “Burst” feature which adds a new gameplay dynamic alongside the traditional “Spin Finish” and “Over Finish”. With the “Burst” feature, a Beyblade Burst top can burst into pieces during a battle, resulting in a “Burst Finish”. This innovation was designed to increase excitement with the possibility of more exhilarating battles.
Since introduction, the Beyblade Burst™ Performance Top System™ has received multiple updates and adjustments to its core mechanics, including improved Beyblade Parts, Beystadiums, and Shooters. Hasbro would begin development into their updates to distinguish themselves from the Takara Tomy Beyblade Burst brand. This created two distinct business strategies, with both companies focusing their resources on different aspects of the game.
Takara Tomy focused much of their development towards the advancement and improvement of Energy Layer technology, with much of their product lines centering around different series of Energy Layer, each with a distinct gimmick.
Hasbro, however, would devote much of their resources toward the advancement of Performance Tip and Beystadium technology.
Performance Top System™ Components
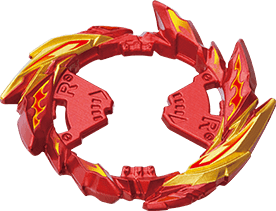
Each Beyblade Burst™ top is composed of 3 parts, each playing a distinct role in how the top will perform.
The ENERGY LAYER™ represents an ancient fighting spirit and acts as the main point of contact between two tops in combat. Each ENERGY LAYER™ affects how the BEYBLADE BURST™ top engages with an opponent when they collide in battle.
The FORGE DISC™ is a die-cast metal ring that sits between the ENERGY LAYER™ and PERFORMANCE TIP™. Each disc varies in weight and shape to affect the center of gravity and weight of the top, causing different reactions in battle.
The PERFORMACE TIP™ serves as the base of every BEYBLADE BURST™ top and influences how your BEYBLADE BURST™ top maneuvers around the BEYBLADE BURST Beystadium™.
Unlike the previous generation of Beyblade tops, BEYBLADE BURST™ tops do not require an Assembly Tool to assemble them. Instead, this generation of Beyblade tops follows a similar process to first-generation Beyblade systems.
How to Assemble a Beyblade Burst Top
- Align and stack the Energy Layer on top of the Forge Disc using the slots of the Energy Layer and the tab-like Stoppers on the Forge Disc. (※ The Stoppers should be positioned at the middle of the slot lanes while stacking.)
- Align and stack the Energy Layer and Forge Disc combination onto the head of the Performance Tip using the socket-like underside of the Forge Disc until properly fit.
- Adjust the Energy Layer to align with the grooves of the Performance Tip's center, spring pad.
- With all components properly aligned, press and hold the components together while twisting the Energy Layer counterclockwise (or clockwise, for
 Left Spin Energy Layers) until firmly secured. The stoppers on the Forge Disc should reach the ends of the slots on the Energy Layer.
Assembling a BEYBLADE BURST™ top follows a similar procedure as Generation 1 Beyblades, which requires a twisting action and without the need for additional tools. When properly followed, the process also prepares the "Burst" feature. During the fourth step of assembly, with all components being pressed together, both the Energy Layer and Forge Disc interact with elements of the Performance Tip in distinct fashions, with the Energy Layer engaging with the circular, spring pad (located on the top of the Performance Tip) while the Forge Disc engages with the two tabs (located on the sides of the head of the Performance Tip). This interaction causes these elements to slide down, compressing the spring coil inside the Performance Tip as the components are set and locked, priming the "Burst" feature. During assembly, the Energy Layers clicks while being twisted into place. These "clicks" are caused by the interaction between the Energy Layers's teeth (located on the underside of the Energy Layers) sliding over the Performance Tip's spring pad and can be used to gauge the progress of a fully-assembled Beyblade approaching "Burst" activation. As the Layer is hit during battle, it will become progressively unscrewed from the Performance Tip. When the Energy Layers becomes completely loosened, the coil spring inside the Performance Tip is released, sending the Forge Disc and Energy Layers flying in an explosive finish.
How To Win
Each player (also called a Blader) loads their BEYBLADE™ top onto their BEYBLADE™ launcher and pulls the ripcord (called a Launch) over the Beystadium™ at the same time. The Blader to gain 3 points wins the match. Bladers engages in "Point Matches" based upon the game's point system (shown below):
|
|
|
If you knock your opponent’s BEYBLADE BURST™ top out of the ring or into one of the pockets. |
If your opponent’s BEYBLADE BURST™ top stops spinning before yours. |
If your opponent’s BEYBLADE BURST™ top bursts in battle. |
Beyblade Burst Product Series
Announced in April 2015, Takara Tomy revealed their third-generation Beyblades to Japanese consumers. In promotional material, Takara Tomy would outline the details of their new product and their new
The Dual Layer System Series
“
{{{quote}}}
— {{{speaker}}}Template:Small
„
In April 2016, following the initial release of the Beyblade Burst toyline, Takara Tomy introduced the next entry into the BEYBLADE BURST™ product line. This being the ![]() "Dual Layer System" (デュアルレイヤーシステム). Beyblade Burst tops in this series feature Layers with a revised, composite design, using a two-tier, gestalt structure comprising a Layer Core and Over Layer. The Layer Core is the central component of the Dual Layer that acts as a base for the Over Layer, and usually facilitates major combat functions. This component also features the effigy of the Beyblade's Avatar. Conversely, the Over Layer is the clear-material component(s) of the Dual Layer that covers the Layer Core and assists in shock absorption during collisions. This component also features the initials of the Dual Layer (engraved in its center). Most Over Layers are designed for added shock absorption and to complement the Layer Core.
"Dual Layer System" (デュアルレイヤーシステム). Beyblade Burst tops in this series feature Layers with a revised, composite design, using a two-tier, gestalt structure comprising a Layer Core and Over Layer. The Layer Core is the central component of the Dual Layer that acts as a base for the Over Layer, and usually facilitates major combat functions. This component also features the effigy of the Beyblade's Avatar. Conversely, the Over Layer is the clear-material component(s) of the Dual Layer that covers the Layer Core and assists in shock absorption during collisions. This component also features the initials of the Dual Layer (engraved in its center). Most Over Layers are designed for added shock absorption and to complement the Layer Core.
The term "Triple Layer" (トリプルレイヤー) is used to describe any Dual Layer Beyblades with a three-tier structure. This applies almost exclusively to B-48 Starter Xeno Xcalibur.M.I and B-66 Starter Lost Longinus.N.Sp. The hallmark feature of this design is the inclusion of an additional layer part(s) atop the OverLayer. Both Beyblades have features unique from each other, with Xeno Xcalibur possessing an extended, sword-shaped "Sword Layer" (ソードレイヤー) and Lost Longinus possessing "Metal Dragon Layer Parts" (鋼鉄の龍レイヤーパーツ).
Evolution Beys: The God Layer System & SwitchStrike™ Tech
Hasbro would release these Beys under the ![]() BEYBLADE BURST™ SWITCHSTRIKE™ brand.
BEYBLADE BURST™ SWITCHSTRIKE™ brand.
Switchstrike Beyblades are the second-generation of Beyblade Burst tops released by Hasbro. These battling tops featured specialized Energy Layers equipped with Switchstrike Tech (Japanese: 神能力 「God Ability」)[1] unique battle actions. This series of Beyblades were originally released by Takara Tomy in Japan under their ![]() God Layer System (Japanese: 神レイヤーシステム) series, which launched their third-generation of Beyblade Burst tops on March 18, 2017 starting with the
God Layer System (Japanese: 神レイヤーシステム) series, which launched their third-generation of Beyblade Burst tops on March 18, 2017 starting with the ![]() B-73 Starter God Valkyrie.6V.Rb. These battle features have varying degrees of activation, ranging from immediate to rare.
B-73 Starter God Valkyrie.6V.Rb. These battle features have varying degrees of activation, ranging from immediate to rare.
Along with God Layers, this system also introduced a new customization option in the form of two-part, customizable Discs. These upgraded Discs consisted of two (2) components: a "Core Disc" (Japanese: コアディスク) and a "Frame" (Japanese: フレーム). The Core Disc is the metal component of this new type of Disc and come in a variety of weights, designs, and shapes, similar to standard Discs. While this part can be used seperately, when assembled with a Frame, Core Discs gain an added dimension of interaction that is normally unavailable to them, and drastically alters how the Beyblade top behaves in battle. Discs with this design feature were given the Frame Compatibility (Japanese: フレーム対応) label (denoted by the small, blue box beside the image of the Disc description at the rear of the product package) and are compatible with other Discs.
Incidentally, this very innovation was first introduced with the Heavy Metal System series of First Generation Beyblades, featuring similar two-part, Customized Weight Disks.
Incorporated with every God Layer is a removable, circular token called a God Chip (Japanese: ゴッドチップ). While particularly inessential, God Chips provide aesthetics to the Beyblade, but offers no practical value. Takara Tomy produced a variety of God Chip called Metal God Chip (Japanese: メタルゴッドチップ). These variants were more useful in competitive play simply because of their increased weight.
The Mugen Beystadium DX Set included a special Metal God Chip specifically designed for the God Valkyrie Energy Layer called the Strike God Chip (撃ゴッドチップ). When properly applied, God Valkyrie's "Spring Blade" God Ability is disabled, but enables a "barrage attack" capability.
When Hasbro began distributing Beyblade Burst products internationally, much of the naming structure would be changed, possibly to create a distinction between themselves and the Takara Tomy Beyblade Burst brand. This includes the renaming of the customizable Discs as "Two-Part Forge Disc" and the "Frame" as "Rings"[2] and the continued use of their component code system.
With this system, the combo naming system for the two-part Forge Disc followed a simple format, using the full number of the Core Disc followed by the first letter of the Frame (e.g. "5" Disc with Glaive = 5G). Changes to the abbreviation system also extend to Switchstrike Energy Layers. as the first letter of the first word is lowercase, while the first letter of the second word is uppercase (e.g. God Valkyrie = gV).
Turbo Beys: The Cho-Z Layer System & SlingShock™ Tech
The fourth series of Beyblade Burst tops released by Takara Tomy in March 2018, introduced the "Cho-Z Layer System" (Japanese: 超Ƶレイヤーシステム), starting with the ![]() B-104 Starter Winning Valkyrie.12.Vl. These Beyblades feature Energy Layers reinforced with zinc-alloy metal parts, resulting in more intense, high-impact battles. These Energy Layers also feature their own signature gimmicks and properties called a "Cho-Z Ability" (Japanese: 超Ƶアビリティ). (e.g. Winning Valkyrie's "Metal Slash" (メタルスラッシュ).)
B-104 Starter Winning Valkyrie.12.Vl. These Beyblades feature Energy Layers reinforced with zinc-alloy metal parts, resulting in more intense, high-impact battles. These Energy Layers also feature their own signature gimmicks and properties called a "Cho-Z Ability" (Japanese: 超Ƶアビリティ). (e.g. Winning Valkyrie's "Metal Slash" (メタルスラッシュ).)
This series also continues the use of customizable Core Discs and Frames that were first introduced with the God Layer System. New Core Discs and Frames were produced that are also backward-compatible with previous Core Discs and Frames.
Similar to the God Chips of the God Layer System, Cho-Z Layers have a unique customization option. Using hoop-shaped accessories called "Level Chips" (レベルチップ), that fit beneath the 'face' of a Cho-Z Layer, players can improve various facilities of the Layer such as stability, locking mechanism, even weight when equipped. Level Chips also plays a special role in official wbba. competitions and are usually exclusively obtainable at official wbba. events. Though, they can be acquired through alternative means (i.e. CoroCoro promotional).
In mid November 2018, Takara Tomy released the ![]() B-127 Starter CHO-Z VALKYRIE.Z.Ev, the first of three Beyblade tops featuring the revolutionary, new Cho-Z Ability: Cho-Z Kakusei (Japanese: 超Ƶ覚醒). Cho-Z Layers with this feature are built with Turbo Blades (Japanese: 超Ƶウイング, Chō-Zetsu Wing) pop-out action that engages with high-powered Launches. When launched with appropriate strength, these Turbo Blades will deploy, switching from their basic Normal Mode (通常モード) to a high-performance Invincible Mode (無敵モード). This drastically improves their overall capabilities, while also deploying Burst Stoppers (バーストストッパー) into the Layer's slots, thus preventing the "Burst" feature from activating.
B-127 Starter CHO-Z VALKYRIE.Z.Ev, the first of three Beyblade tops featuring the revolutionary, new Cho-Z Ability: Cho-Z Kakusei (Japanese: 超Ƶ覚醒). Cho-Z Layers with this feature are built with Turbo Blades (Japanese: 超Ƶウイング, Chō-Zetsu Wing) pop-out action that engages with high-powered Launches. When launched with appropriate strength, these Turbo Blades will deploy, switching from their basic Normal Mode (通常モード) to a high-performance Invincible Mode (無敵モード). This drastically improves their overall capabilities, while also deploying Burst Stoppers (バーストストッパー) into the Layer's slots, thus preventing the "Burst" feature from activating.
Takara Tomy's Beyblade Burst Cho-Z brand referred to this action as the Bey switching from their basic Normal Mode (Japanese: 通常モード) to a high-performance Invincible Mode (Japanese: 無敵モード) while Hasbro's Beyblade Burst Turbo brand referred to this action as the Power Launch Attack.
In an attempt to differentiate it's products from it's Takara-Tomy counterpart, Hasbro released their ![]() SlingShock product line. Beyblade tops in this toyline featured parts that carried many of the same, basic design elements found with Beyblade tops in Takara Tomy's Cho-Z Layer System product line. However, Hasbro, as a development strategy, would make several changes to substitute the zinc-alloy material (the hallmark of Takara-Tomy's Cho-Z Layers) for plastic in the manufacture of their Energy Layers. This series marked the shift in marketing and development of their brand to the development of more Beystadium and Performance Tip-oriented products with the main feature of this series being mode-changing Performance Tips that were designed to be compatible with specialized Beystadiums.
SlingShock product line. Beyblade tops in this toyline featured parts that carried many of the same, basic design elements found with Beyblade tops in Takara Tomy's Cho-Z Layer System product line. However, Hasbro, as a development strategy, would make several changes to substitute the zinc-alloy material (the hallmark of Takara-Tomy's Cho-Z Layers) for plastic in the manufacture of their Energy Layers. This series marked the shift in marketing and development of their brand to the development of more Beystadium and Performance Tip-oriented products with the main feature of this series being mode-changing Performance Tips that were designed to be compatible with specialized Beystadiums.
Gamma Beys: The Gatinko Layer System & HyperSphere™ Tech
Japan's fourth series of Beyblade Burst tops were released in March 2019, starting with ![]() B-133 Ace Dragon.St.Ch Zan DX Starter pack, introducing the "Gatinko Layer System" (Japanese: ガチンコレイヤーシステム, stylized as GaTinko LAYER SYSTEM). In place of a single layer, the Gatinko Layer System is comprised of three parts: the Gatinko Chip (Japanese: ガチンコチップ, Gachinko Chippu), the Weight (Japanese: ウエイト, Ueito), and the Base (Japanese: ベース, Bēsu).
B-133 Ace Dragon.St.Ch Zan DX Starter pack, introducing the "Gatinko Layer System" (Japanese: ガチンコレイヤーシステム, stylized as GaTinko LAYER SYSTEM). In place of a single layer, the Gatinko Layer System is comprised of three parts: the Gatinko Chip (Japanese: ガチンコチップ, Gachinko Chippu), the Weight (Japanese: ウエイト, Ueito), and the Base (Japanese: ベース, Bēsu).
In mid-October 2019, Takara Tomy released a new type of Energy Layer Beyblades with PRIME αPOCALYPSE.0D.Ul' and REGALIA γENESIS.Hy, with the Mugen Lock (Japanese: 無限ロック) feature. These Beys feature Layers built without the "Burst" feature which prevent the Beyblades from Bursting.
BIGBANG γENESIS.0.Ym
GT Ability: Armed Mugen Lock (Japanese: アーマード無限ロック): The BigBang Armor acts as Counter Blades (Japanese: カウンター刃)
The Beyblade Burst™ Hypersphere™ series, introduce by Hasbro, features Hypersphere™ Performance Tips designed to climb the vertical walls of Hypersphere™ Beystadiums™ and battle on the brink. Get the drop on your opponents with Hypersphere tech! Battle in a Hypersphere Beystadium and drop into battle for more epic burst moments. Beyblade Burst Rise™ Hypersphere™ tops come with a removable GT Chip in the Energy Layer. Interchangeable with other right-spin GT Chip-compatible tops.
SuperKing Beys: The SuperKing Layer System!!
“
{{{quote}}}
— {{{speaker}}}Template:Small
„
The SuperKing Layer System (Japanese: 超王レイヤーシステム) is the fifth product line in the Beyblade Burst™ franchise produced by TakaraTomy and introduces new Beyblade Burst™ tops with customizable Energy Layers. Similar to Energy Layers found with Gatinko Beys, Bladers can customize the Energy Layers of their SuperKing Beys using parts within this system. However, SuperKing Beys use a different parts system than what was used in the previous series, consisting of the following parts:
SUPERKING CHIP
| |
 |
RING
|
 |
CHASSIS
|
SuperKing Layers appear to be really simple to customize and offer a level of modification that no other kind of Energy Layer can match!
SuperKing Beys will make their first, official release with the B-159 Booster Super Hyperion.Xc 1A.
News of this new (and presumably final) product line was teased in late February of 2020 by Japanese media sources. Similar to the GT Layer System, this latest parts system features a new Customizable Energy Layers with a revised customization mechanic than the previous Beyblade Burst parts system.
The SuperKing Layer System also continues the trend of named special features for their Beys, in this series called a "SuperKing Ability" (Japanese: 超王アビリティ).
Turbo Awakening (Japanese: 超Ƶ覚醒)
The Turbo Valtryek Whip deals immediate Burst Damage to the enemy Bey using a fast and heavy attack from the blades of the Turbo Valtryek V3 Energy Layer. When Turbo Valtryek enters its Turbo Awakening state, Resonance-based energy blades ignite from the Turbo Blades and deals massive Stability and Burst Damage to the enemy Bey.
ブレイブヴァルキリー.Ev'2A
PARTS
~ヴァルキリー~
戦いの神ヴァルキリーモチーフ。ベイブレード全体をロックする右回転のスパーキングチップ。
~ブレイブ~
大型ラバー刃の摩擦力で相手をとらえ、ラバーの弾力でバウンド攻撃を仕掛けるアタックタイプの右回転リング。
~2A (ツーエー)~
大きな3枚のラバー刃で相手に強烈に引っ掛かり攻撃を与える右回転ダブルシャーシ。
~エボリューションダッシュ~
全高が高く、使い込むことによって軸先が削れて動きが変化する。強化バネが内蔵されていることで、攻撃力がさらに上がったアタック系ドライバー。
ACTION
“
{{{quote}}}
— {{{speaker}}}Template:Small
„
“
{{{quote}}}
— {{{speaker}}}Template:Small
„
In the actual product line, the Super Strike is labeled the Superking Ability of the featured Beyblade of the B-159 booster pack: Super Hyperion.Xc 1A. Referencing the information printed on the packaging, the Super Strike uses the Super Ring, in conjunction with the 1A Chassis, to deal immediate Burst Damage to the enemy Bey. This is achieved by the design and architecture of the individual Ring and Chassis components which form a low-angled slope for an enhanced Upper Attack.
“
{{{quote}}}
— {{{speaker}}}Template:Small
„
Trivia
- The actual script for the kanji "神能力" reads "Shinnōryoku" meaning "Divine Ability"
- Each Beyblade Burst product produced by Takara Tomy were manufactured using the following materials:
PA: Polyamide PC: Polycarbonate plastic PMMA: Poly(methyl methacrylate) plastic
POM: Polyoxymethylene ABS: Acrylonitrile butadiene styrene Zinc-Alloy (亜鉛合金)
PVC: Polyvinyl chloride
| PA: Polyamide | PC: Polycarbonate plastic | PMMA: Poly(methyl methacrylate) plastic |
| POM: Polyoxymethylene | ABS: Acrylonitrile butadiene styrene | Zinc-Alloy (亜鉛合金) |
| PVC: Polyvinyl chloride |
References
- ↑ The term "Evolution Ability" is used and printed on product packaging for Funskool products.
- ↑ Beyblade Burst Evolution Ultimate Tournament Collection (Hasbro Product Page).. Details found in product description.
Template:Beyblade Systems